Using Fujifilm Recipes: My Experience and Advice
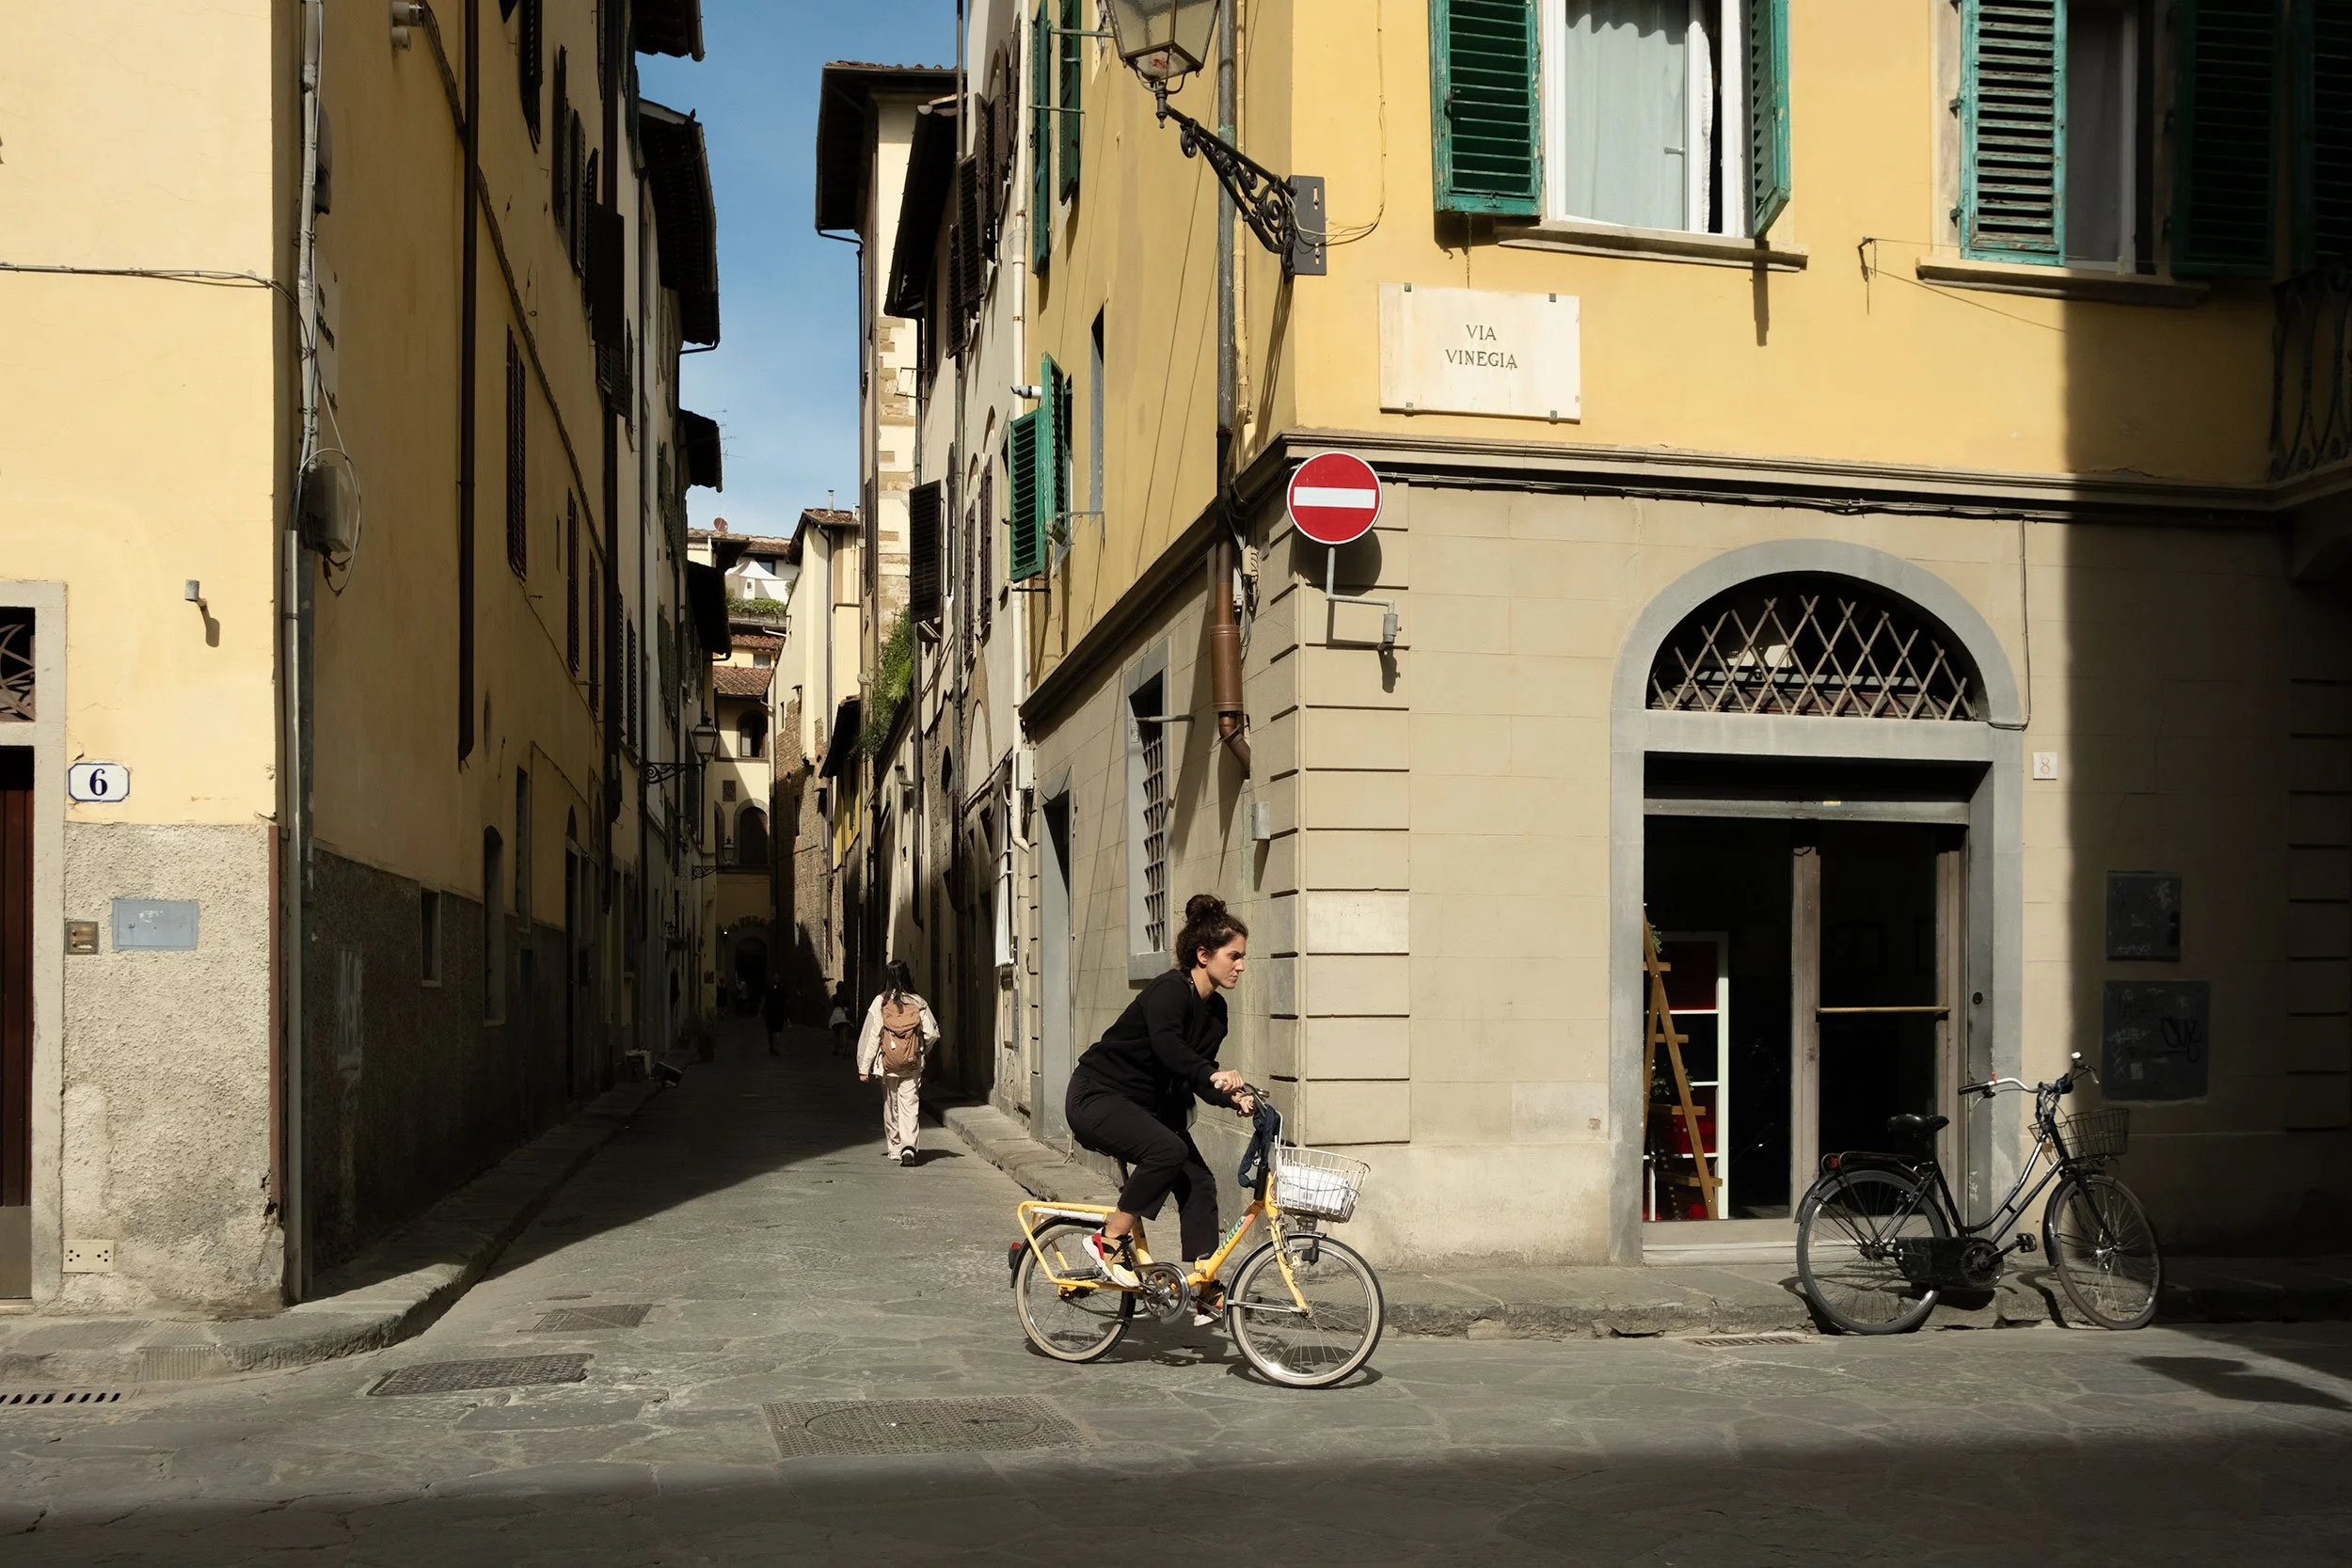
Florence - Alpine Negative Film Recipe
Fujifilm recipes have substantially changed the way I shoot. I have been using variations of recipes for the past few years, starting primarily on the Fujifilm X-E4 and then moving over to the current X-H2. These recipes have allowed me to experiment more in ways I would have never thought possible; I’ve created many images that I am very proud of after experimenting and using recipes for some time now.
What Is a Film Recipe?
A film recipe is a set of customized camera settings used with Fujifilm cameras. These settings include film simulation modes, dynamic range, highlight and shadow adjustments, colour saturation, noise reduction, sharpening, and grain effects. They are designed to replicate the look of classic film stocks or create unique styles. Film recipes are convenient and fun ways to experiment with your photography.
I wanted to share some tips and advice based on my experience with recipes to help you get more comfortable using them and continue to do so with your favourite ones.
1. Shoot RAW + JPEG Until You Are Satisfied With the Look of a Recipe
When you use a film recipe, your chosen custom settings are captured in a JPEG format. JPEGs do not offer much flexibility for editing. It may take a while before you determine if a specific film recipe is something you prefer. It could take several different shooting conditions and environments or even weeks of experimenting before you decide if a recipe works for you and is something you wish to continue to use. As a result of this experimentation, I always recommend shooting RAW + JPEG, at least for the first few outings.
When shooting both formats, you can capture a JPEG copy with the film recipe intact and a RAW duplicate. The RAW image will give you much more flexibility for editing. When experimenting with film recipes, it can be challenging to immediately identify how much it has changed from a RAW photo. With both a RAW and a JPEG copy, you can have both side-by-side during your post-processing stage. This can help identify those changes and what you like and dislike about the actions of a particular recipe. If you don’t like it, you can edit a RAW as desired. This is a great way to identify the impact of a film recipe.
After experimenting with a film recipe for a while and determining if you like this style, you can switch to capturing JPEGs only. This will minimize your options in post, but having only JPEGs without RAWs to fall back on can be an interesting dynamic in your work.
2. Don’t Overwhelm Yourself
When first experimenting with film recipes, it’s easy to be overwhelmed by the choices. As a result, I recommend selecting one or two recipes and trying them for a while. I also recommend trying some of the most well-known and used film recipes that first recreate an older film stock look. These recipes are the most accepted and renowned, and it’s fun to see how your photos look with a popular film stock.
Your Fujifilm camera should be able to hold up to seven recipes. And after time, you will possibly have seven that you like and use often. But first, focus on a few to get used to the process. Using a film recipe only a few times is perhaps not enough time to understand whether it’s something for you. Switching back and forth too much with recipes can be enough for you to abandon film recipes altogether due to too much choice or undesirable and inconsistent results.
3. Watch Your Dynamic Range
Dynamic range can initially be confusing, but understanding the basics is critical. It can make a world of difference in your photos. Fujifilm cameras offer dynamic range percentage settings (DR100%, DR200%, DR400%). You will notice the DR setting as one of the steps for setting up a film recipe. Dynamic range allows more detail in darker areas like shadows and lighter areas like skies. I think all Fujifilm cameras capable of a dynamic range shift have the same settings, but for this example, let’s take the Fujifilm X-H2.
DR100%: This is a bit misleading as DR100% essentially means no further dynamic range processing. You can think of this as being “off.” A balanced exposure. It’s the best setting for capturing deep shadows and bright, almost overexposed skies.
DR200%: The camera reduces exposure by one stop, capturing more highlight detail. It then adjusts the tone curve to lift shadows, resulting in a slightly more balanced dynamic range.
DR400%: The camera reduces exposure by two stops. So, essentially doubling the dynamic range of 200%. Pretty straightforward. For example, if you want to get darker, deeper skies on a bright day, this is what you want to use.
I like using a dynamic range of 200% or 400%, but only in certain conditions. On overcast days with flat light, I feel that using dynamic range worsens things—the image is too flat. It looks excellent on sunny days with lots of contrast and colour.
Dynamic range is something to experiment with, but you should watch how you use it because it does affect RAW files. The RAW files will be more flexible to edit, but the dynamic range adjustment will still be evident. Remember this when using a higher dynamic range and shooting JPEG + RAW.
NOTE: A higher dynamic range requires a higher ISO setting. The settings vary between cameras, but they can range from about 500 ISO to 800 ISO for DR400. I never have concerns about this, as the X-H2 is fantastic for noise handling, but it is something to keep in mind if noise in your photos tends to bother you.
4. Keep Note of Your Best Recipes
Various websites have recipes; sometimes, you’ll find slight variations of the same recipe. You’ll want to note your settings and keep them in a safe spot, a custom document you can easily refer to. If you used a recipe for a while, it’s easy to forget where you first found it and what version you used. You’ll want to use the exact settings from before to maintain consistency in future work.
There are methods to look at EXIF data from an image and compare settings listed to recipes. Still, I’d recommend adding some notes to your photos to remember the simulation used. I usually shoot an entire series with one recipe, so my method entails that once imported, I name the folder and include the name of the recipe I used. It is easy to identify as a folder on a computer, and it is easy to see that info in Lightroom (because of the folder I imported). If I ever want to know what recipe I used, even years later, I’ll have that info readily accessible.
Conclusion
Film recipes are a fantastic way to experiment with your photography. Understanding how they work and impact your photography is essential in using them effectively. With so many film recipes out there, the options can seem endless. Some are better than others, and once you find the ones that resonate the most with you, the ones you plan to use moving forward, it’s vital to have those settings handy in case they are lost. Identifying which photos in your archive were taken with which recipe is key to organization, and it is an invaluable step in replicating a look again later.