Fujifilm X-H2: How to Save a Film Recipe

Fujifilm film recipes are a combination of customized settings used to capture photographs in unique and original ways. The Fujifilm X-H2, released in September 2022, has standard film simulations “built-in,” allowing you to replicate certain film stocks or looks. The X-H2 includes Provia/Standard, Velvia/Vivid, Astia/Soft, Classic Chrome, PRO Neg. Hi. PRO Neg. Std, Classic Neg., Nostalgic Neg., Eterna/Cinema, Eterna Bleach Bypass, Acros, Monochrome, and Sepia. And with the most recent firmware update (5.00) also includes Reala Ace, which was introduced with the release of the X100V.
These choices have been available for years on many different Fuji models. They work fine independently, although some are much more popular than others. If the standard selections are not precisely what you want, you can create a custom “recipe” that builds off what is already there. Creating and saving a film recipe is not difficult once you understand it, but it can be confusing the first time you go through the steps. Here is how to save a film recipe on the Fujifilm X-H2:
The first step, of course, is to find your recipe. There are many places to find film recipes, but a popular destination to visit is Fuji X Weekly. The recipes are organized by camera sensor, each with multiple examples. The X-H2 uses the X-Trans V sensor. Once you find a recipe you want to experiment with and potentially keep long-term in your camera, we can begin entering the settings. For this example, we will use the Fujicolor 100 Gold recipe.
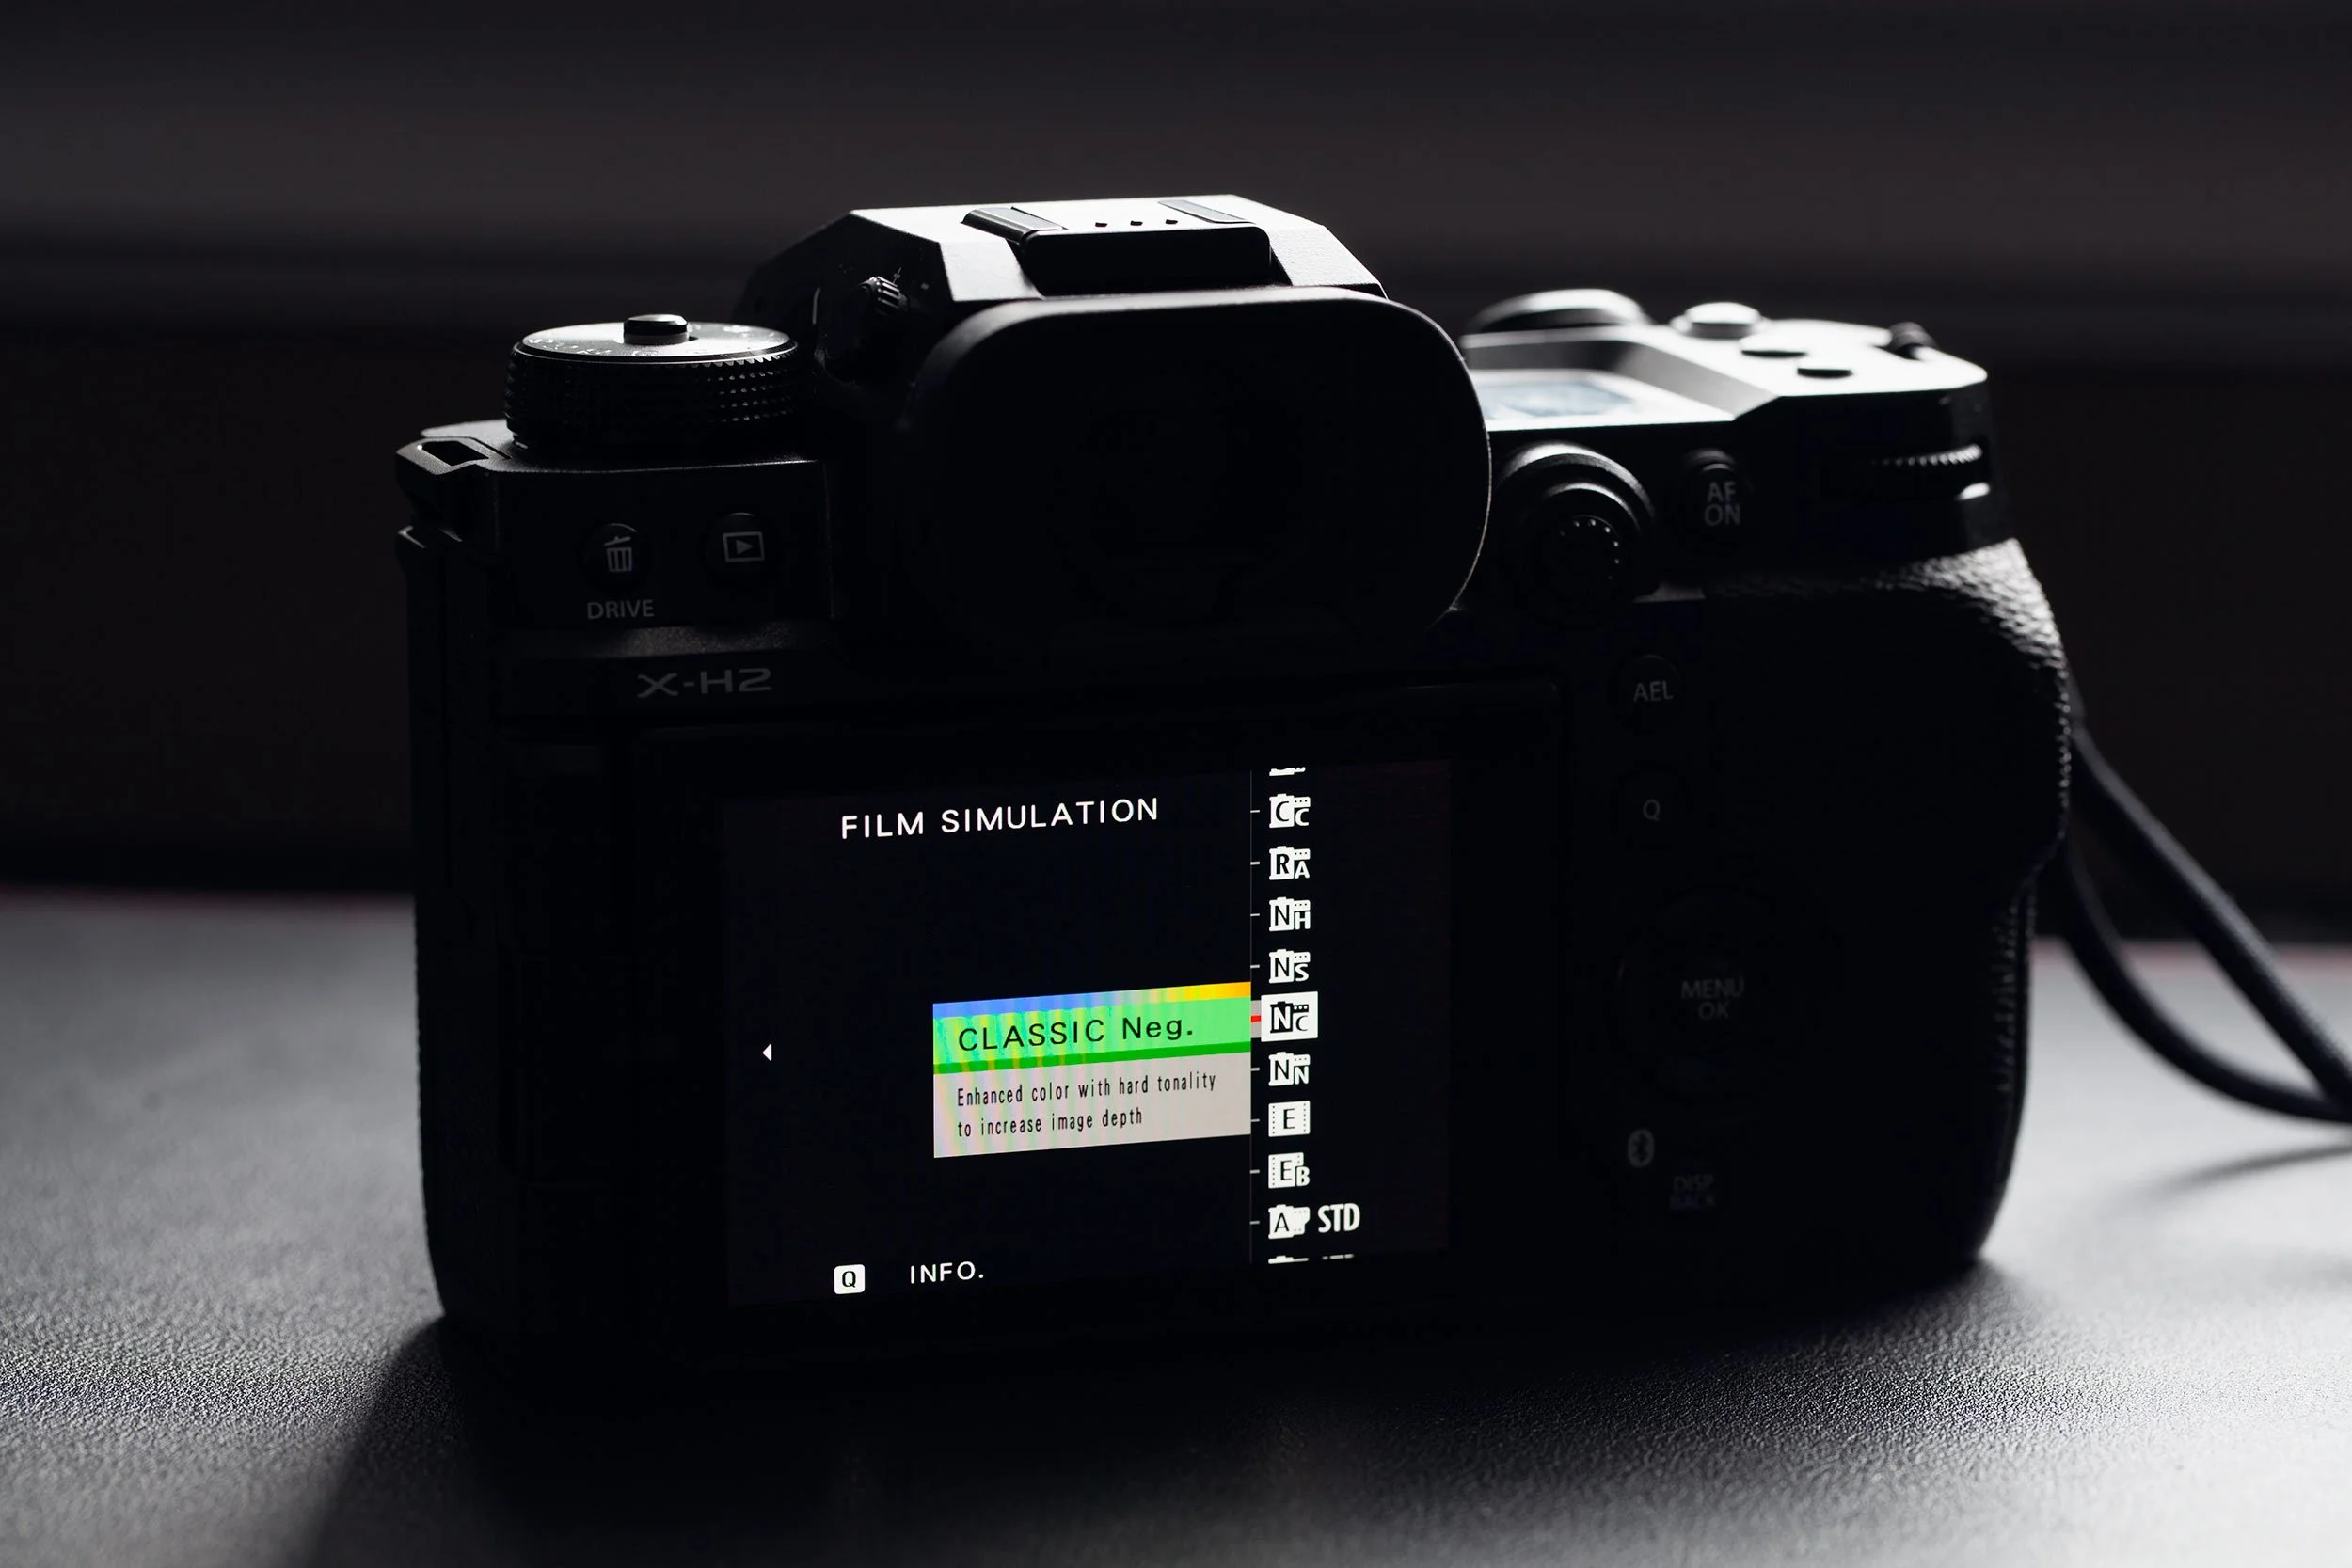
Classic Negative
Dynamic Range: DR400
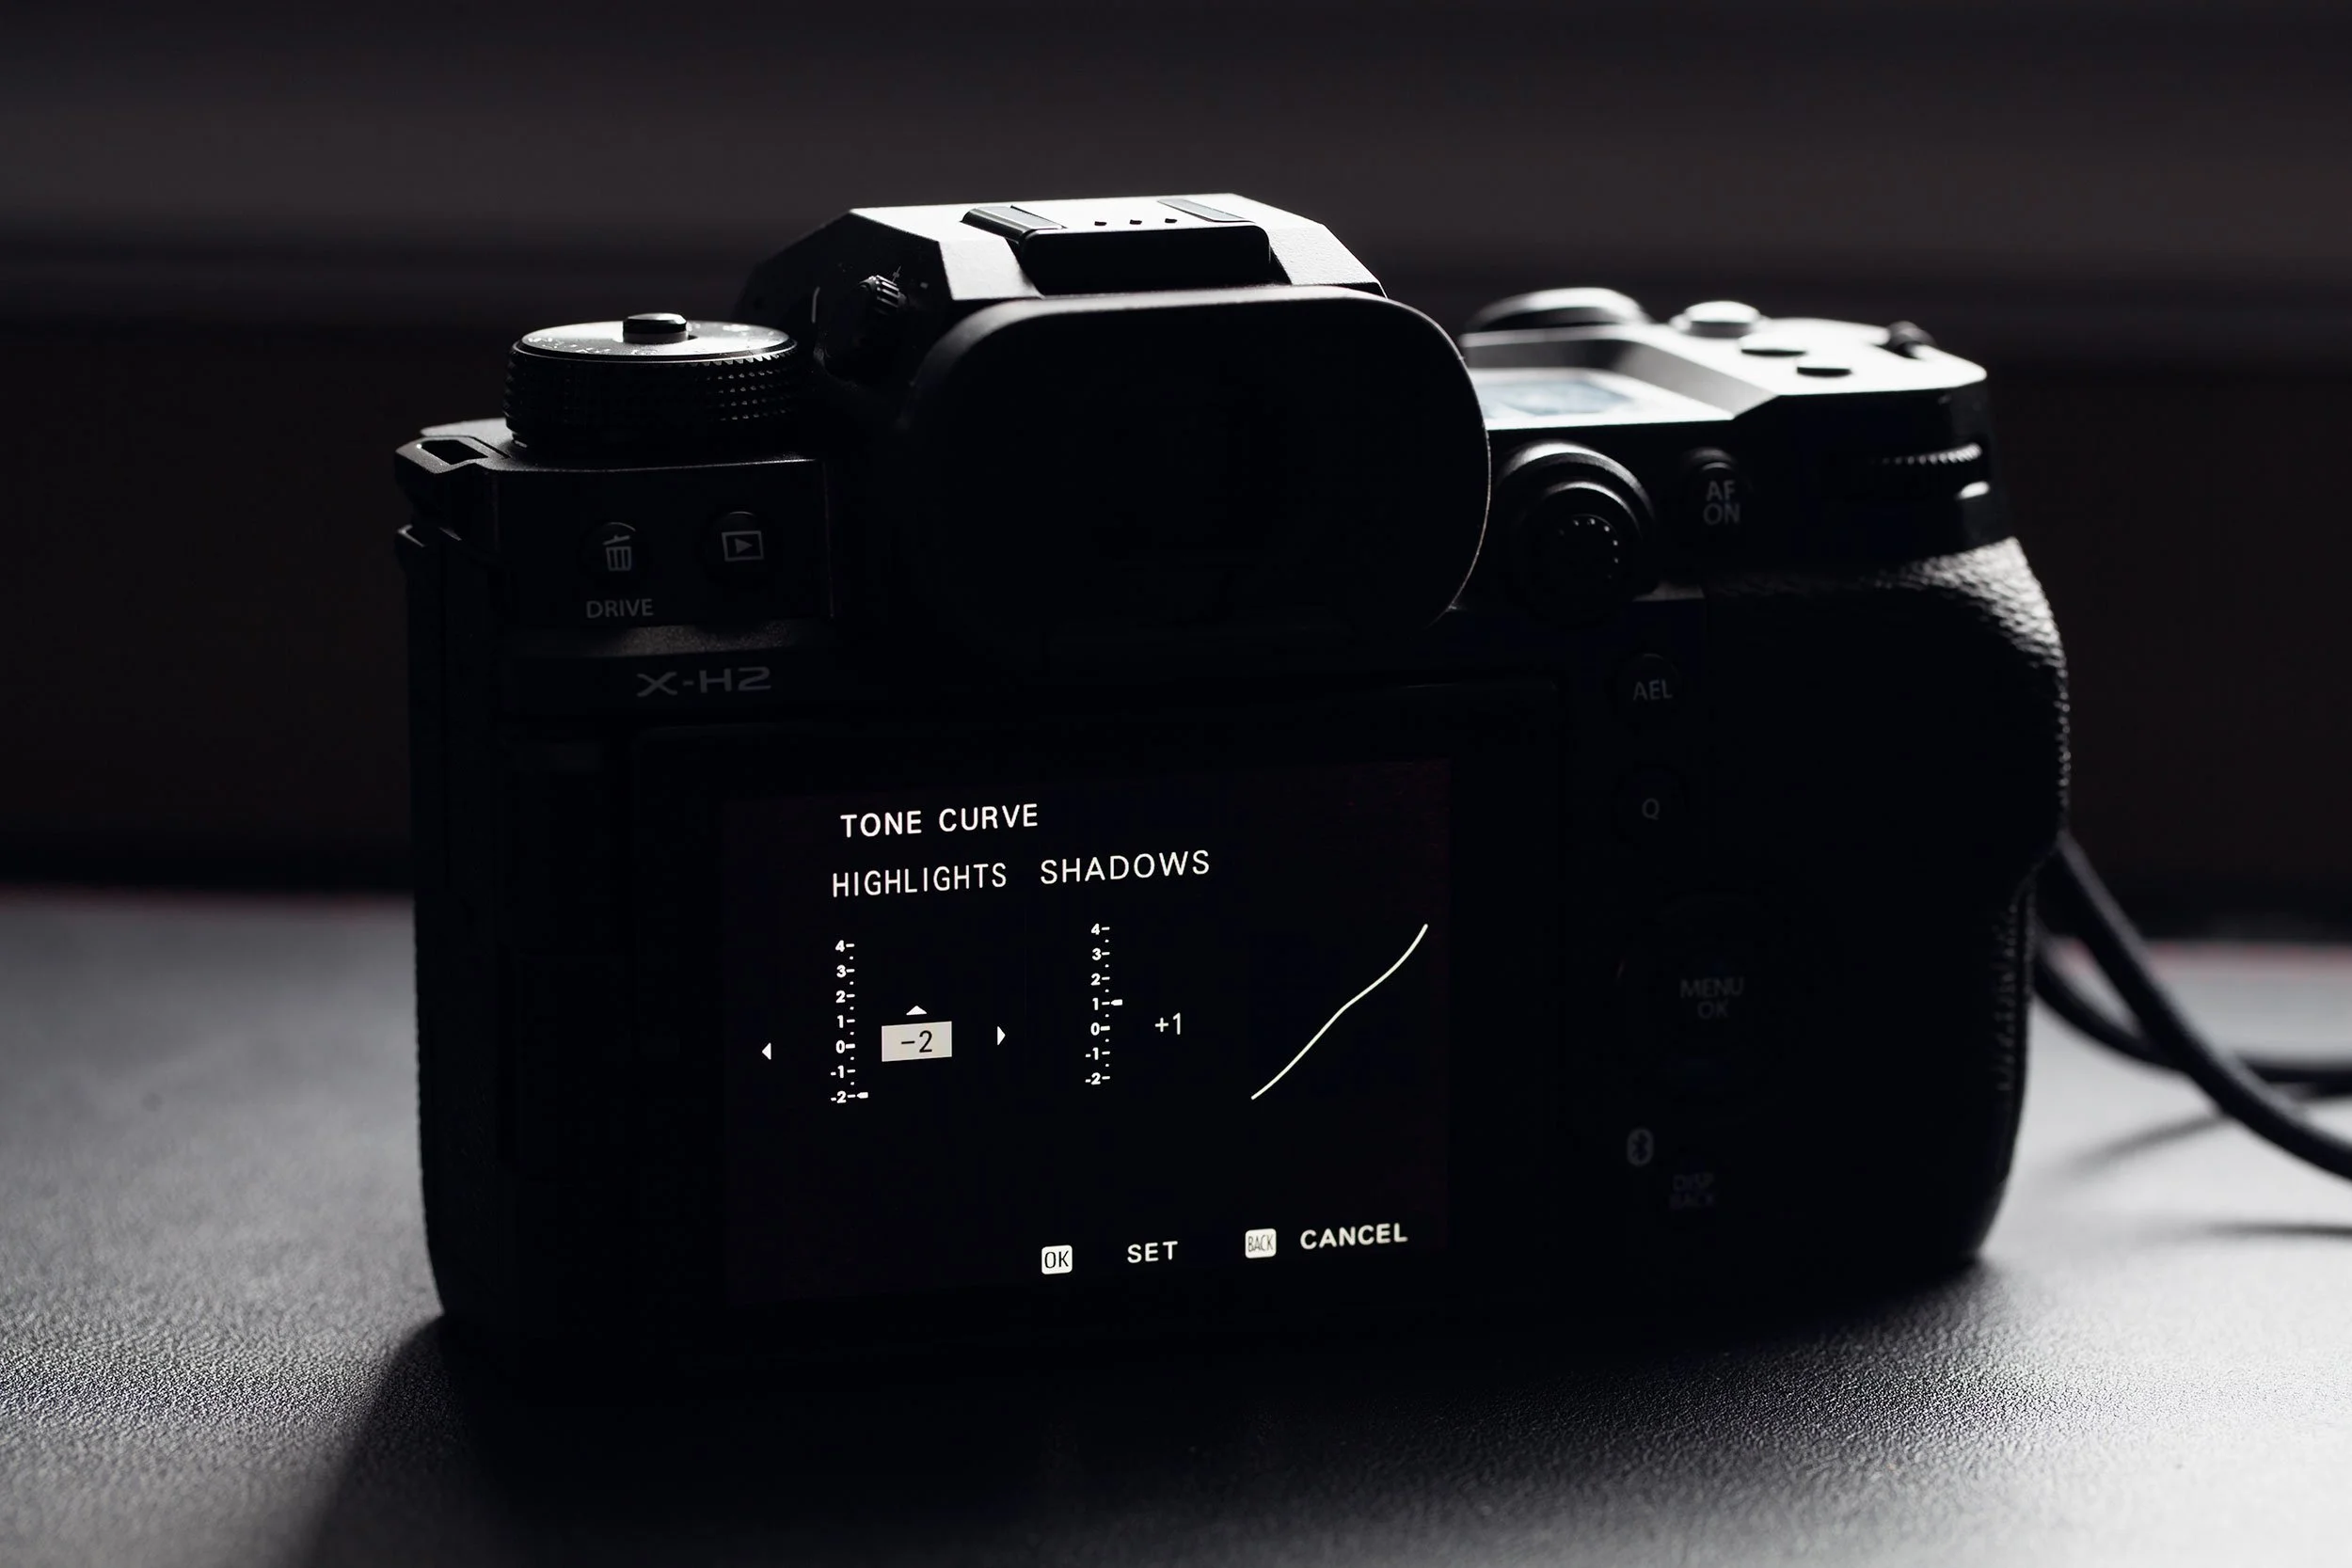
Highlight: -2
Shadow: +1
Colour: +3
Noise Reduction: -4
Sharpness: -2
Clarity: -2
Grain Effect: Strong, Small
Colour Chrome Effect: Off
Colour Chrome Effect Blue: Off
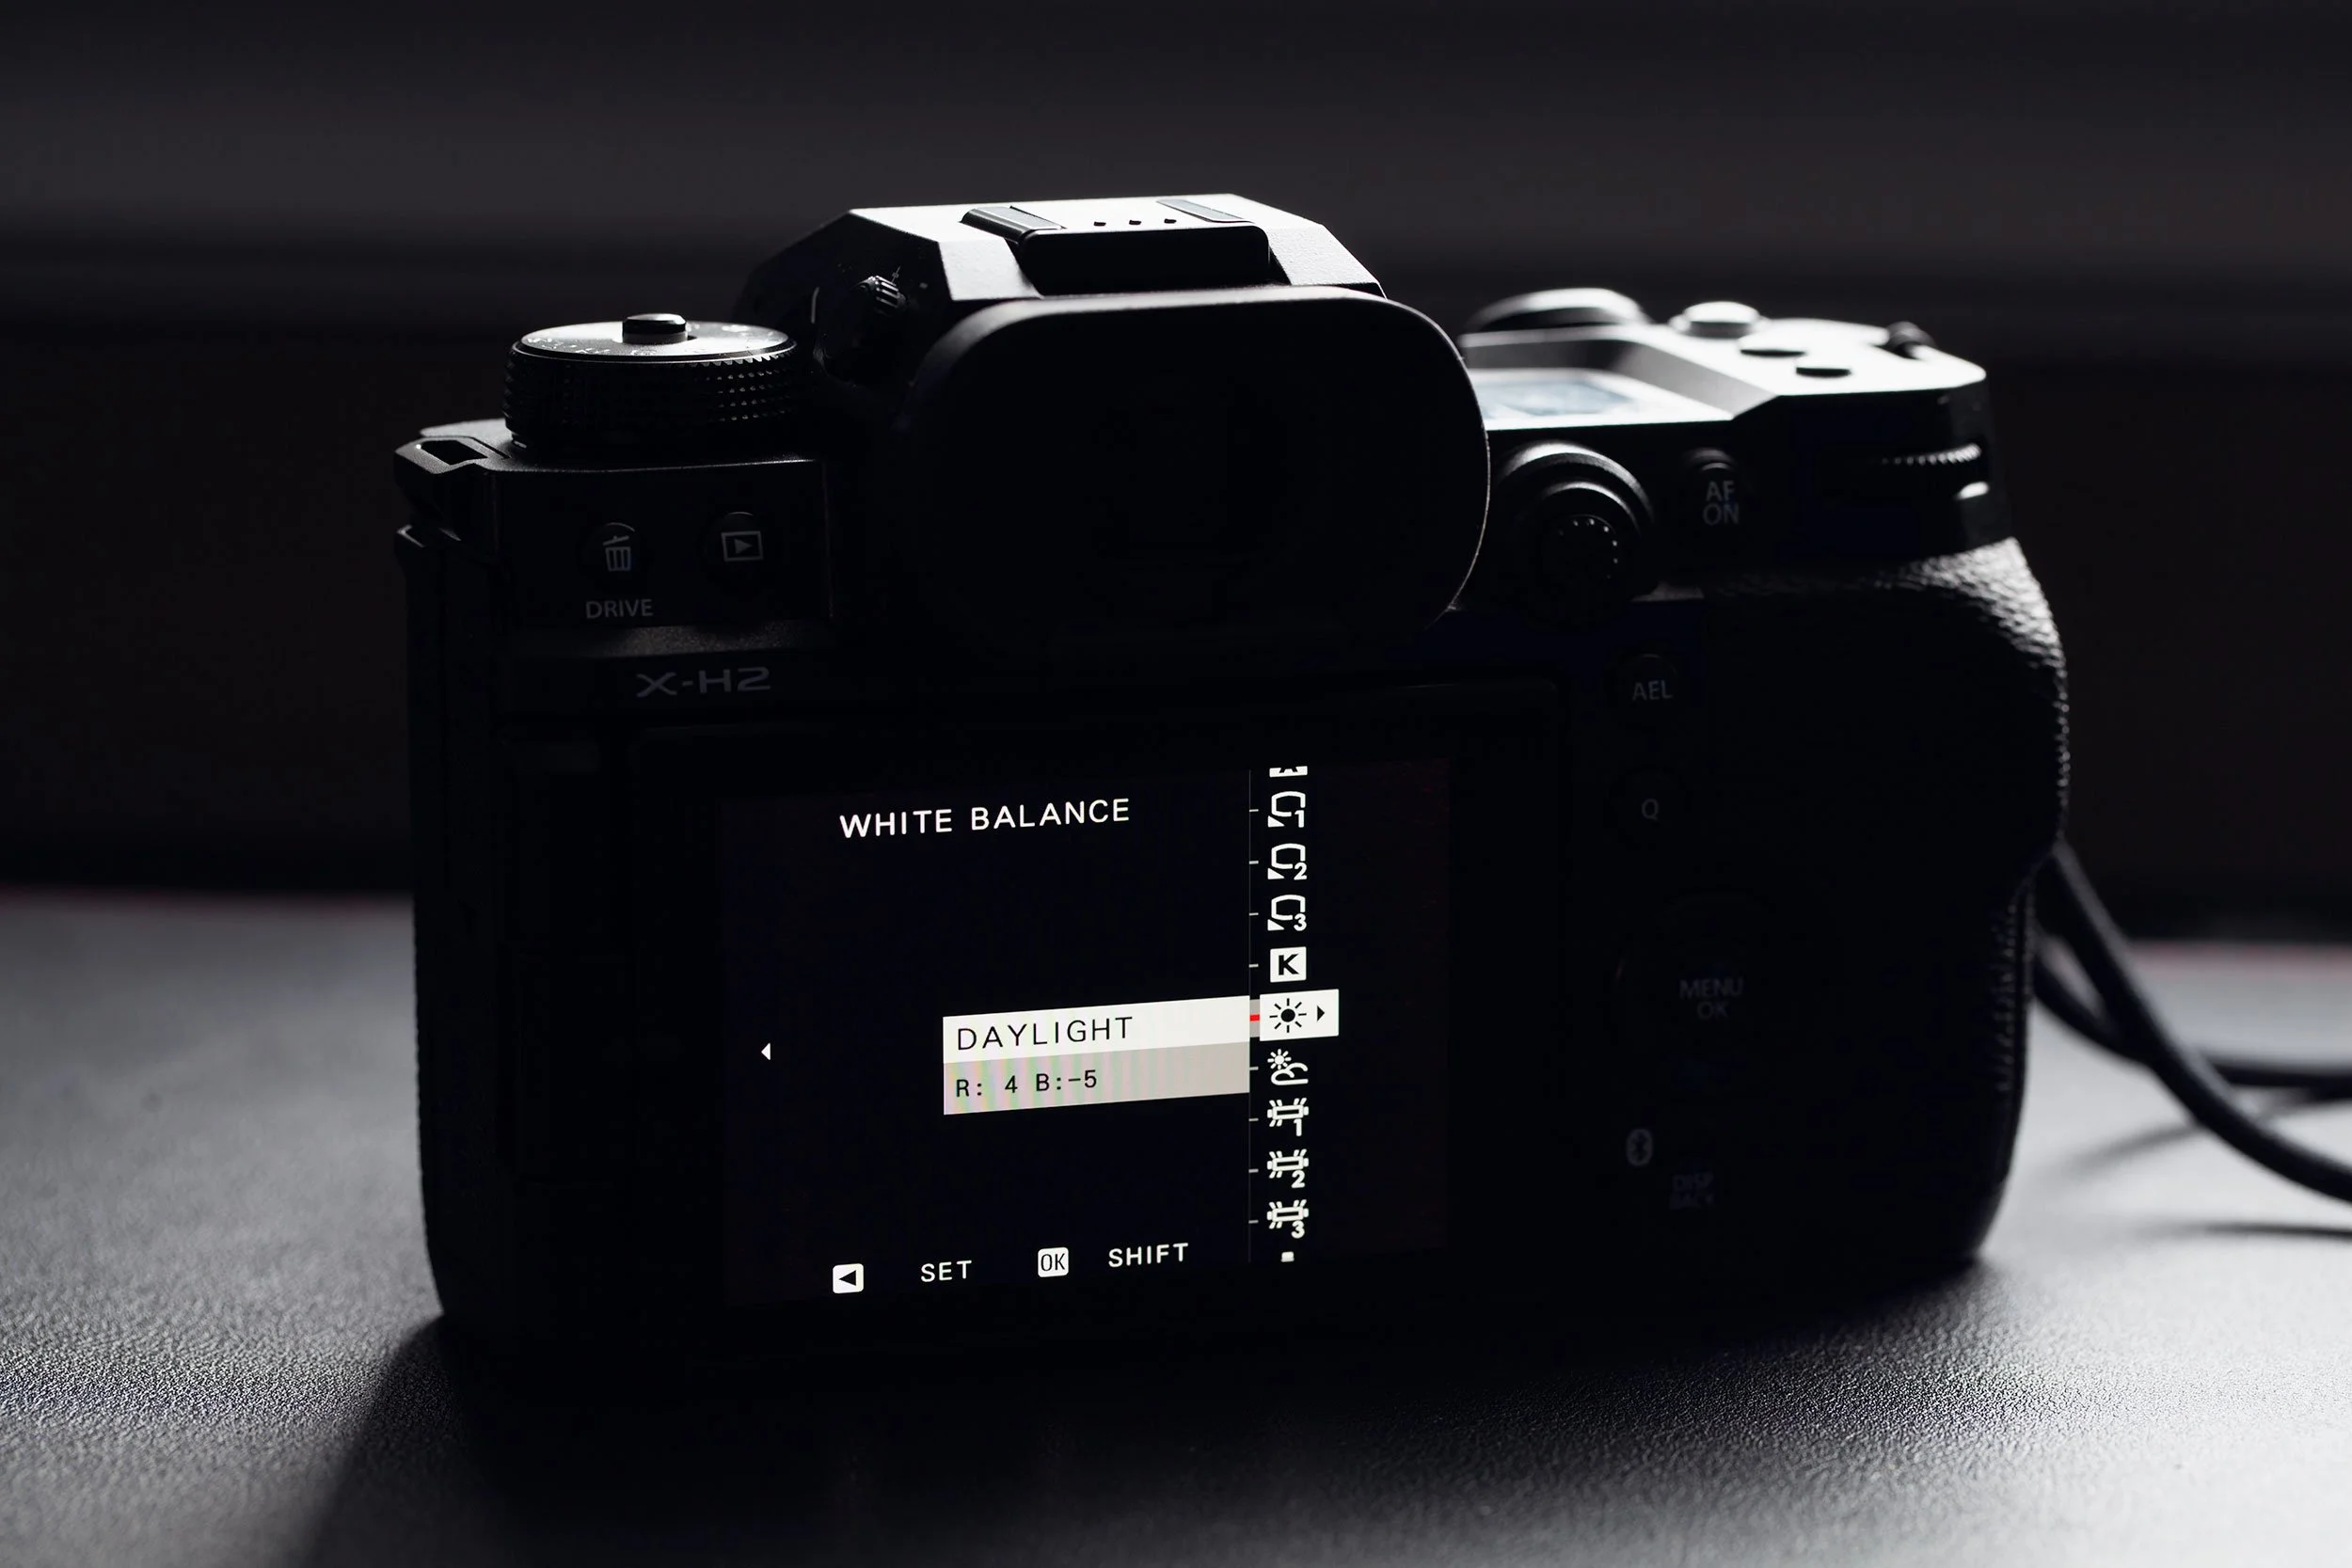
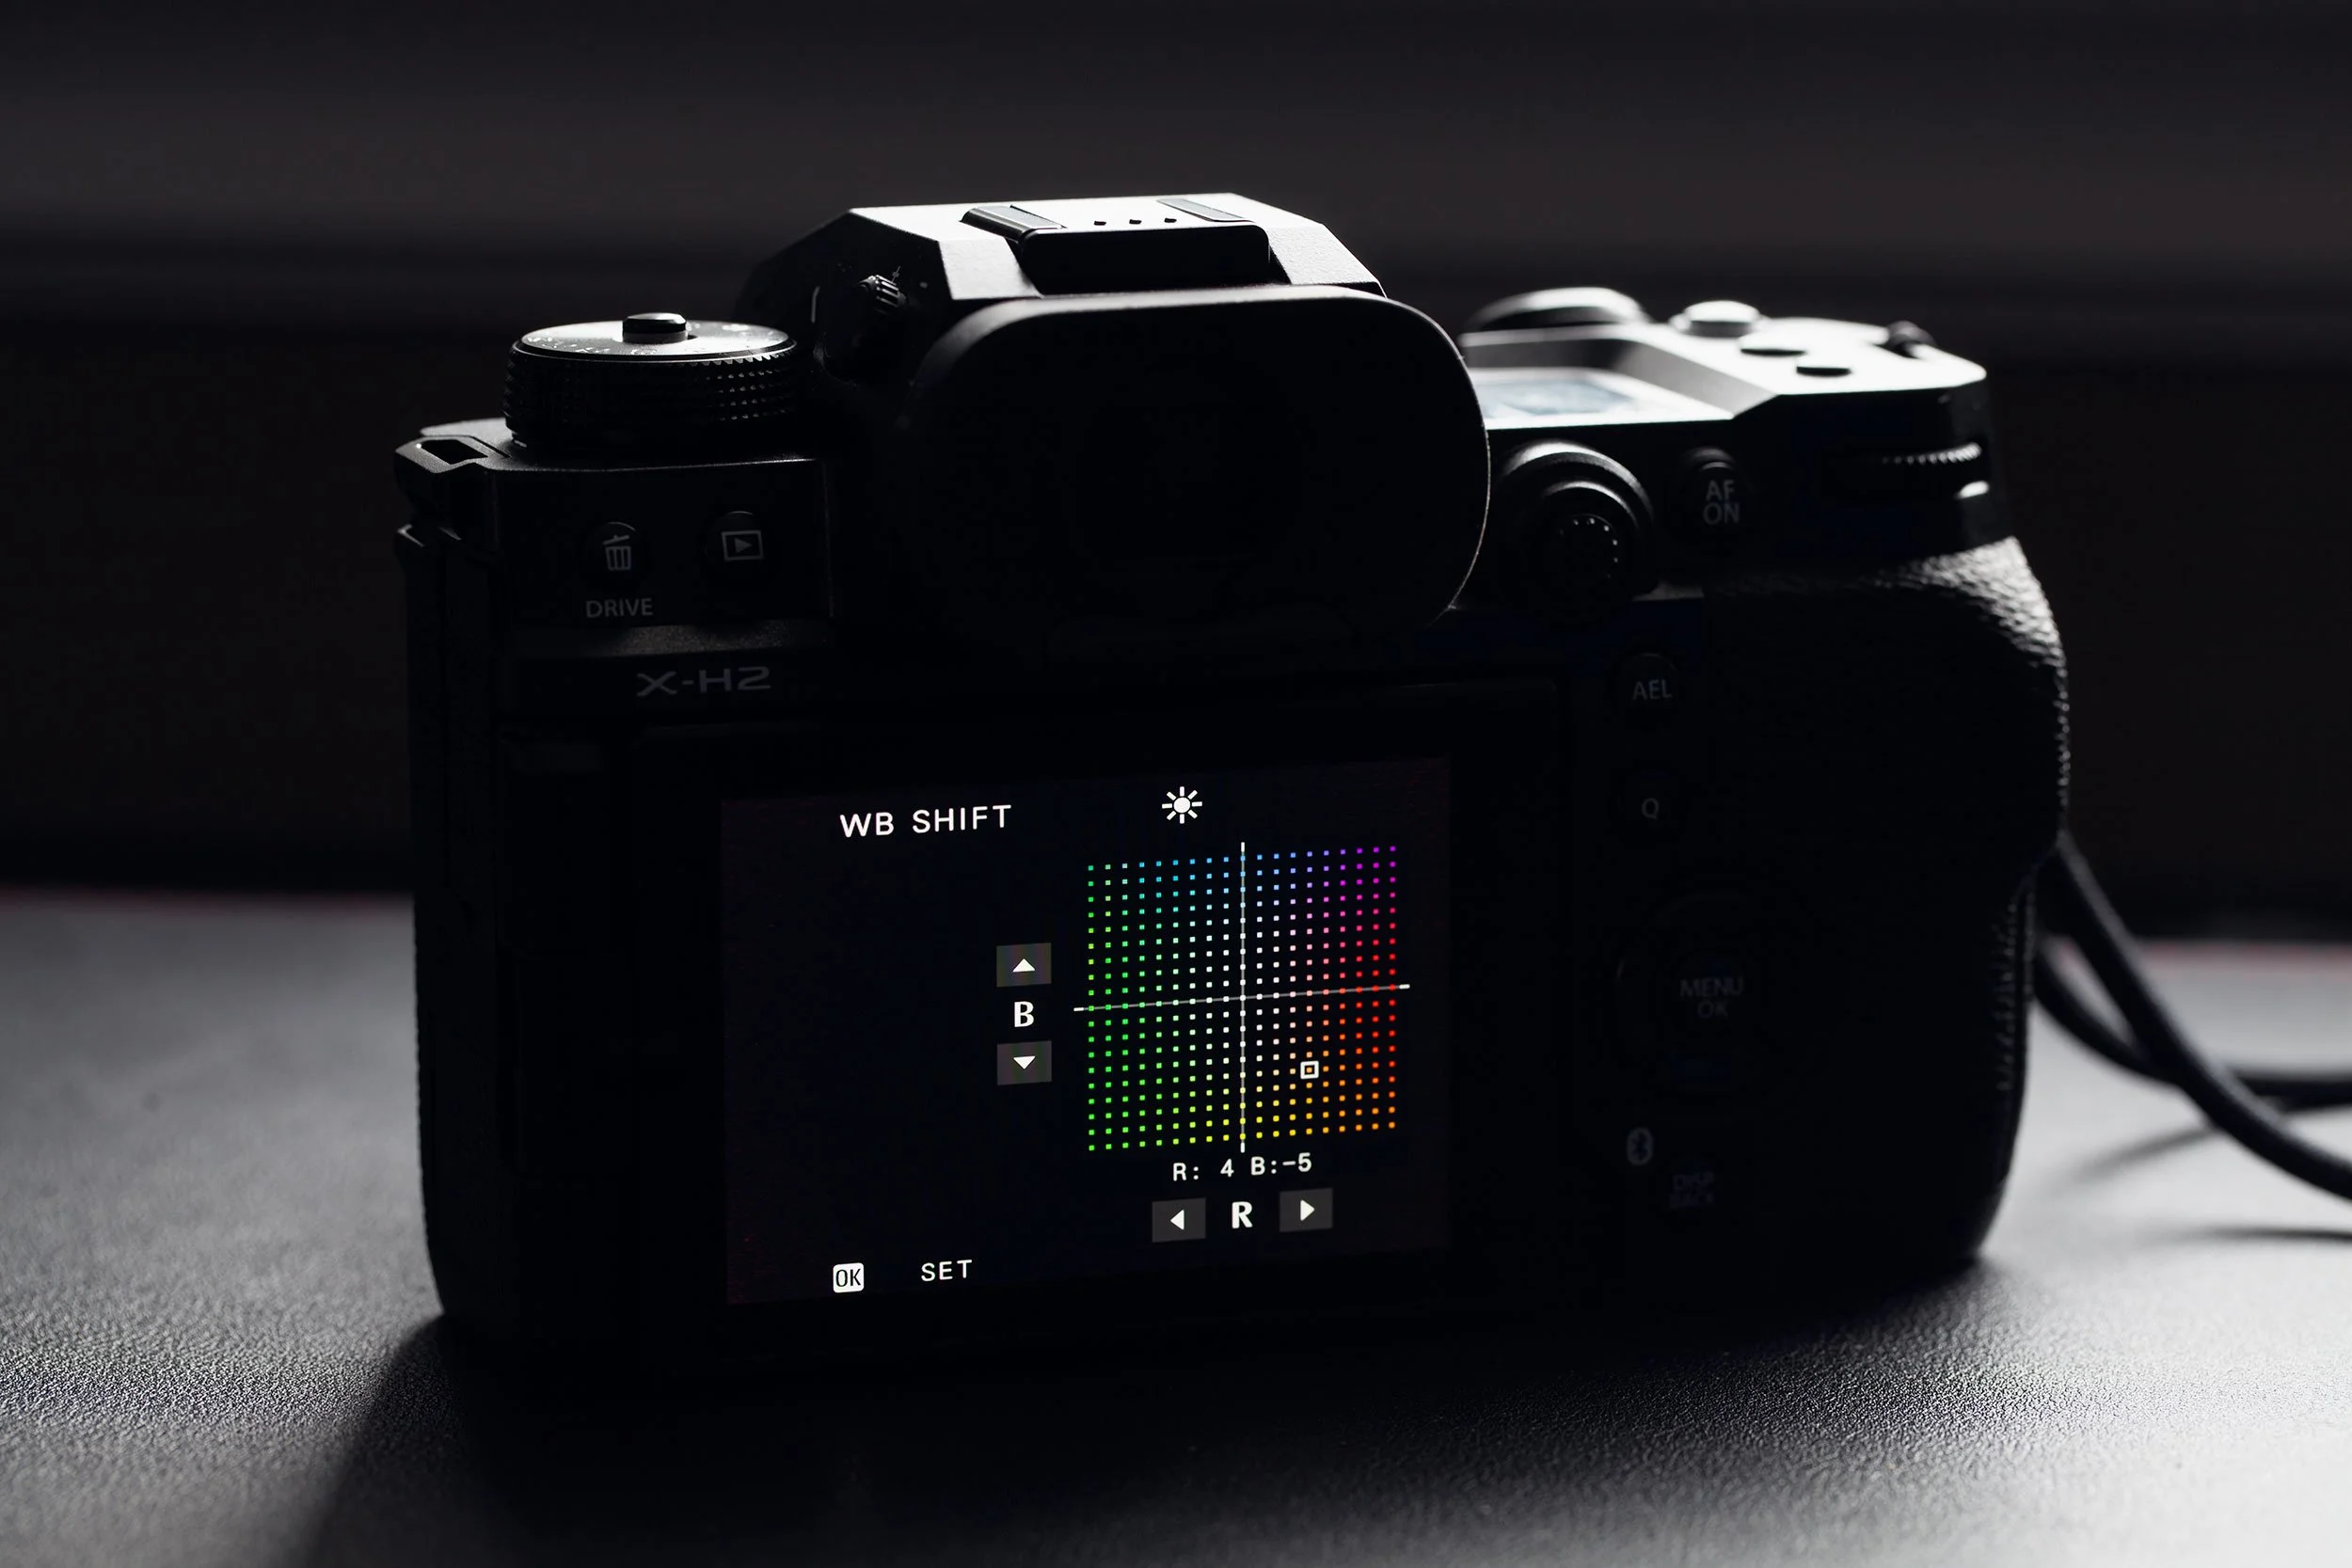
White Balance: Daylight, +4 Red & -5 Blue
ISO: Auto, up to ISO 6400
Exposure Compensation: +2/3 to +1 1/3 (typically)
Page 1
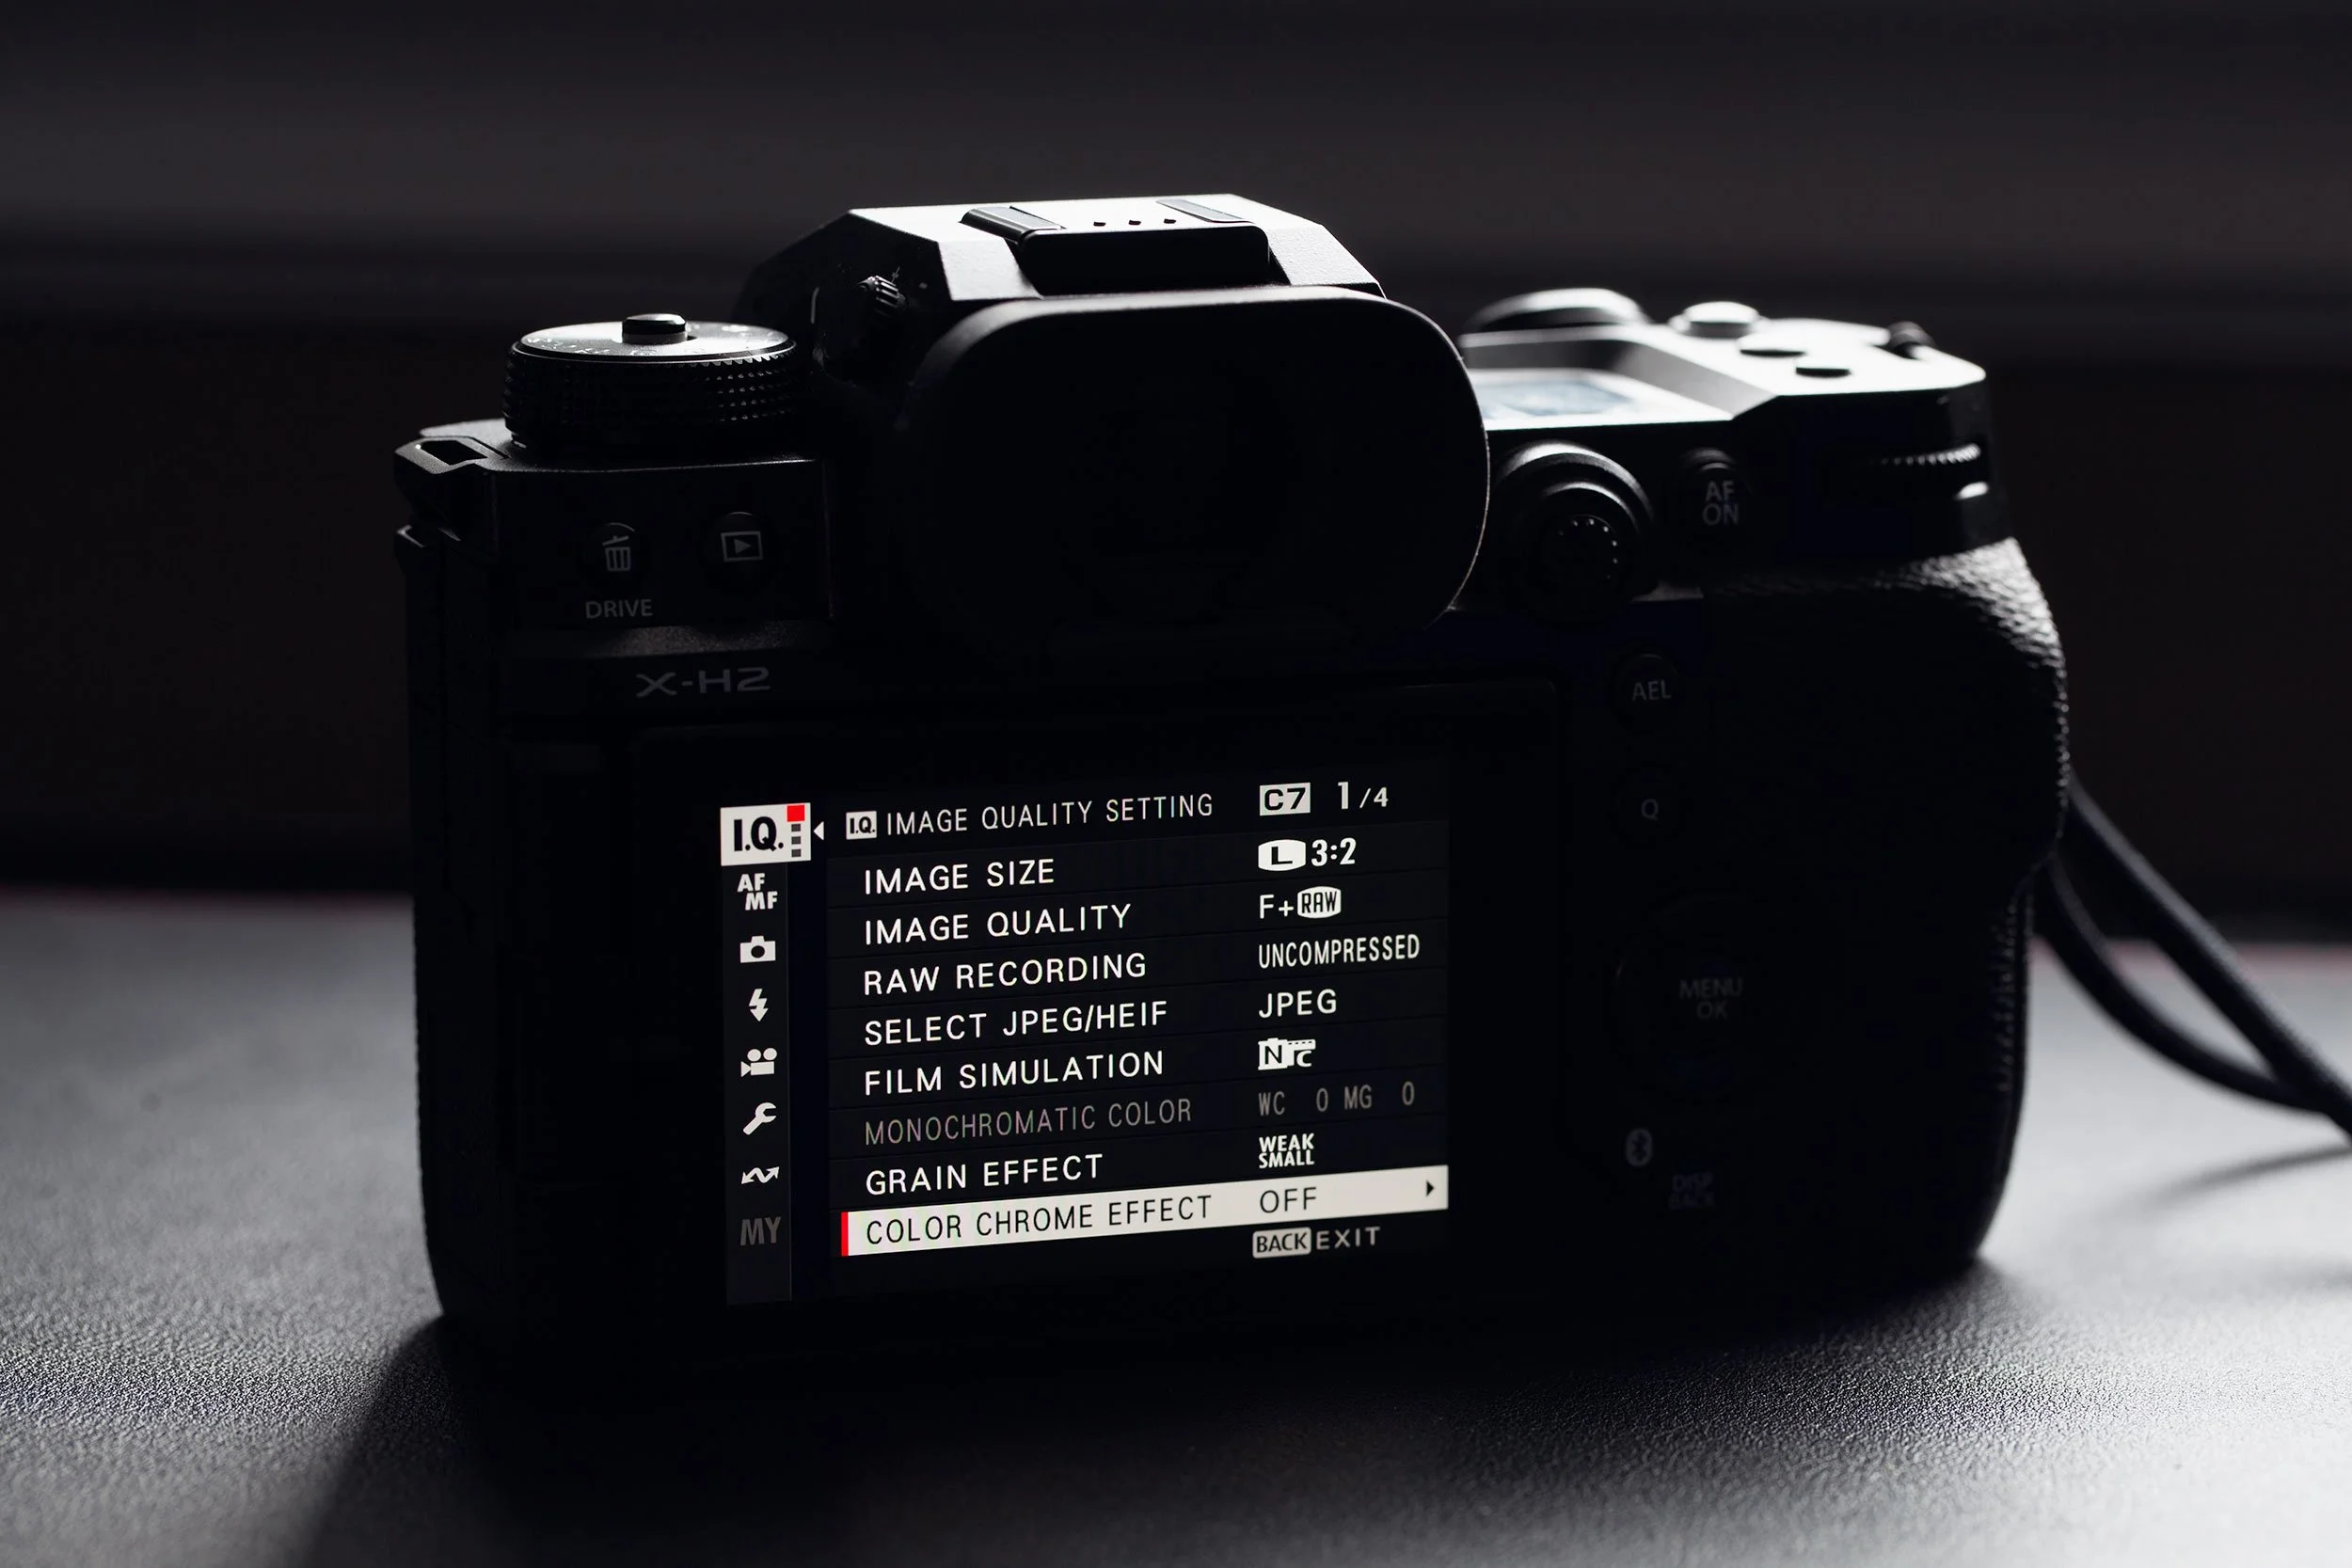
Press the Menu/OK button on the back of the camera, and if you are not already there, go to the first page of the Image Quality (IQ) menu at the top. For this walkthrough, we will call these Pages 1 to 3, as indicated by the four dots to the right of IQ.
Image Quality/Select JPEG/HEIF—The choices reflect the file type and quality you wish to shoot in. If you want to capture a copy of your photo using the film recipe and a RAW file, choose FINE + RAW or NORMAL + RAW. Choosing RAW will have the disadvantage of taking up significantly more memory space. Still, having a RAW file is generally a good idea as it provides more flexibility to edit if you don’t prefer the JPEG.
I shoot FINE + RAW, with RAWs captured on the CF Express card and JPEGS on the SD card.
Film Simulation - Classic Negative
Colour Chrome Effect - Off
Page 2
Colour Chrome FX Blue - Off
White Balance—There are two steps here. First, select Daylight white balance from the menu, then press Menu/OK or the right arrow to access the WB Shift settings. Use the arrow buttons to move to Red (R) of +4 and Blue (B) of -5. The WB Shift can significantly alter the look of your photo.
Dynamic Range - DR400 - DR400 adds two stops of highlight protection to your captures. If this is greyed out, check your ISO settings, as DR400 requires a minimum of ISO 640.
Tone Curve - Highlights -2, Shadows +1
Colour +3
Sharpness - 2
Page 3
High ISO NR -4
Clarity - 2
The above steps are all needed to enter your recipe's settings. Exposure Compensation is commonly listed in the recipe as shooting at the noted exposure will give you the best representation of what the recipe is meant to simulate. However, you can shoot at any exposure compensation you desire.
Finally, we will want to save the recipe to one of the custom dials (C1 to C7) and name it.
Edit/Save Custom Setting - Press Menu/OK or the right arrow, and you will be presented with seven slots to save a custom recipe/simulation. Choose the slot you want and select Save Current Settings. Move the highlight selection to OK, and press the Menu/OK button to save. This step will return you to the previous menu that lists the saved recipes for C1 to C7.
Again, press Menu/OK or the right arrow and move to the last option, Edit Custom Name. Enter the recipe name and then select Set. This will set up your recipe and save it to one of the custom settings on the dial for easy retrieval and use.


Important Notes
Naming the recipe is very helpful. To quickly know what recipe you are using, turn the dial to one of the custom settings and press the Q button on the back of the camera. Your recipe name will be listed on the top left.
In addition, these recipes do not consider your desired shooting mode. If you wish to use the aperture ring on the lens, you must change your shooting mode to Aperture (A). In this case, it can be easily completed by going to the menu where you would save and edit the name of your recipe and choose Edit/Check. It can be changed there. Note that any changes made after saving must be resaved if you want them to be part of the recipe moving forward. If you change anything and turn off the camera without saving, your recipe will revert to the last time you saved it. Your recipe will be saved, but your recent changes will not.

Conclusion
The Fujifilm X-H2 is an excellent camera that can add up to seven custom recipes. The top dial makes it easy to change quickly and shoot using various looks. You can try different recipes with numerous shooting environments and subjects to see what fits you best and delete the ones you don’t like to free them up for other recipes.