Travel Photography: Lightroom Editing Essentials
Adobe Lightroom Reference View
When I return home after travelling, one of the first things I do is import my photos into Lightroom. I anticipate how my images will look on a bigger monitor, and I look forward to digging into them more and reflecting on what has recently transpired.
My editing workflow always begins with Adobe Lightroom; it has become an essential part of my workflow. Once I import my latest travel images into Lightroom, I review them, using the "star" rating to highlight the ones I’ll focus on first. This helps me organize my selection and prioritize the images that stand out the most. I don’t use the 1-5 star rating; instead, it is just a 5 of the ones I will later process and what looks to be a keeper. It’s not uncommon for these ratings to be revised later, and after taking a closer look, I may decide the photo is not as good as I thought and move on. Once the first round of edits is complete, I’ll review the images and highlight the ones I may have missed from my first review.
Even the most minor changes can affect the final result when it comes to editing. This careful attention to detail ensures that every image looks its best. Over time, I’ve learned that these seemingly minor adjustments significantly impact the photo's interpretation. Lightroom's ability to precisely handle these corrections has made it an indispensable tool in my editing workflow. Here are a few essentials I consider.
Straighten Architecture Using Transform
In Lightroom, the Transform tool is a fantastic feature for adjusting perspective and is especially beneficial when photographing architecture and other subjects that are straight and upright. Some angles and lenses can quickly distort subjects, and buildings are one of the most obvious, as everyone recognizes buildings as straight. When photographing tall buildings, especially from a low angle, the vertical lines often seem to lean inwards. This occurs due to the perspective and angle from which the photo is taken. Is this always a negative feature? No, it is not. You may want to emphasize it in some cases. If you are close to a high structure, it is not supposed to appear straight, and the curve inward can highlight the substantiality of the structure. If you want to create a contrast between how large a building is and how small a subject is, you may want to keep some of this curving effect. If you look at architectural and real estate photography, you will notice that the angles are straight, as the photography is used to portray the locations in realistic proportions. If that is your intention, quickly adjusting the Transform vertical slider will help clean up your image and create a more proportioned composition.
NOTE: Be aware that the more an adjustment is needed, the more it will take away from your original composition. If you know you will use Transform later in editing, remember to leave some room when capturing to have that flexibility in Lightroom.
Vertical Transform
Straighten Horizons
This step is an easy one, but one that should not be overlooked. A crooked horizon, even slightly, can make an image seem off quickly. Now, a straight horizon is not essential in all photos; let me explain. Horizons are naturally straight, and people are used to viewing them that way, but it depends on the context and the desired effect. In street photography, for example, your subject is usually not the surrounding area or landscape; it’s more about the human subject and the individual’s actions. In that case, the background is not necessarily crucial to the context. If you are focused on landscape photography or a seascape, you’ll want to ensure it is as straight as possible. If your composition contains mountains and trees, it may be challenging to know what is straight, but it’s easy to see and correct with a seascape or a flatter horizon at a distance.
A tilted horizon can disrupt the sense of balance. The guidelines in Lightroom and a subtle rotation will correct this and should be one of the first things you do.
Crop Effectively
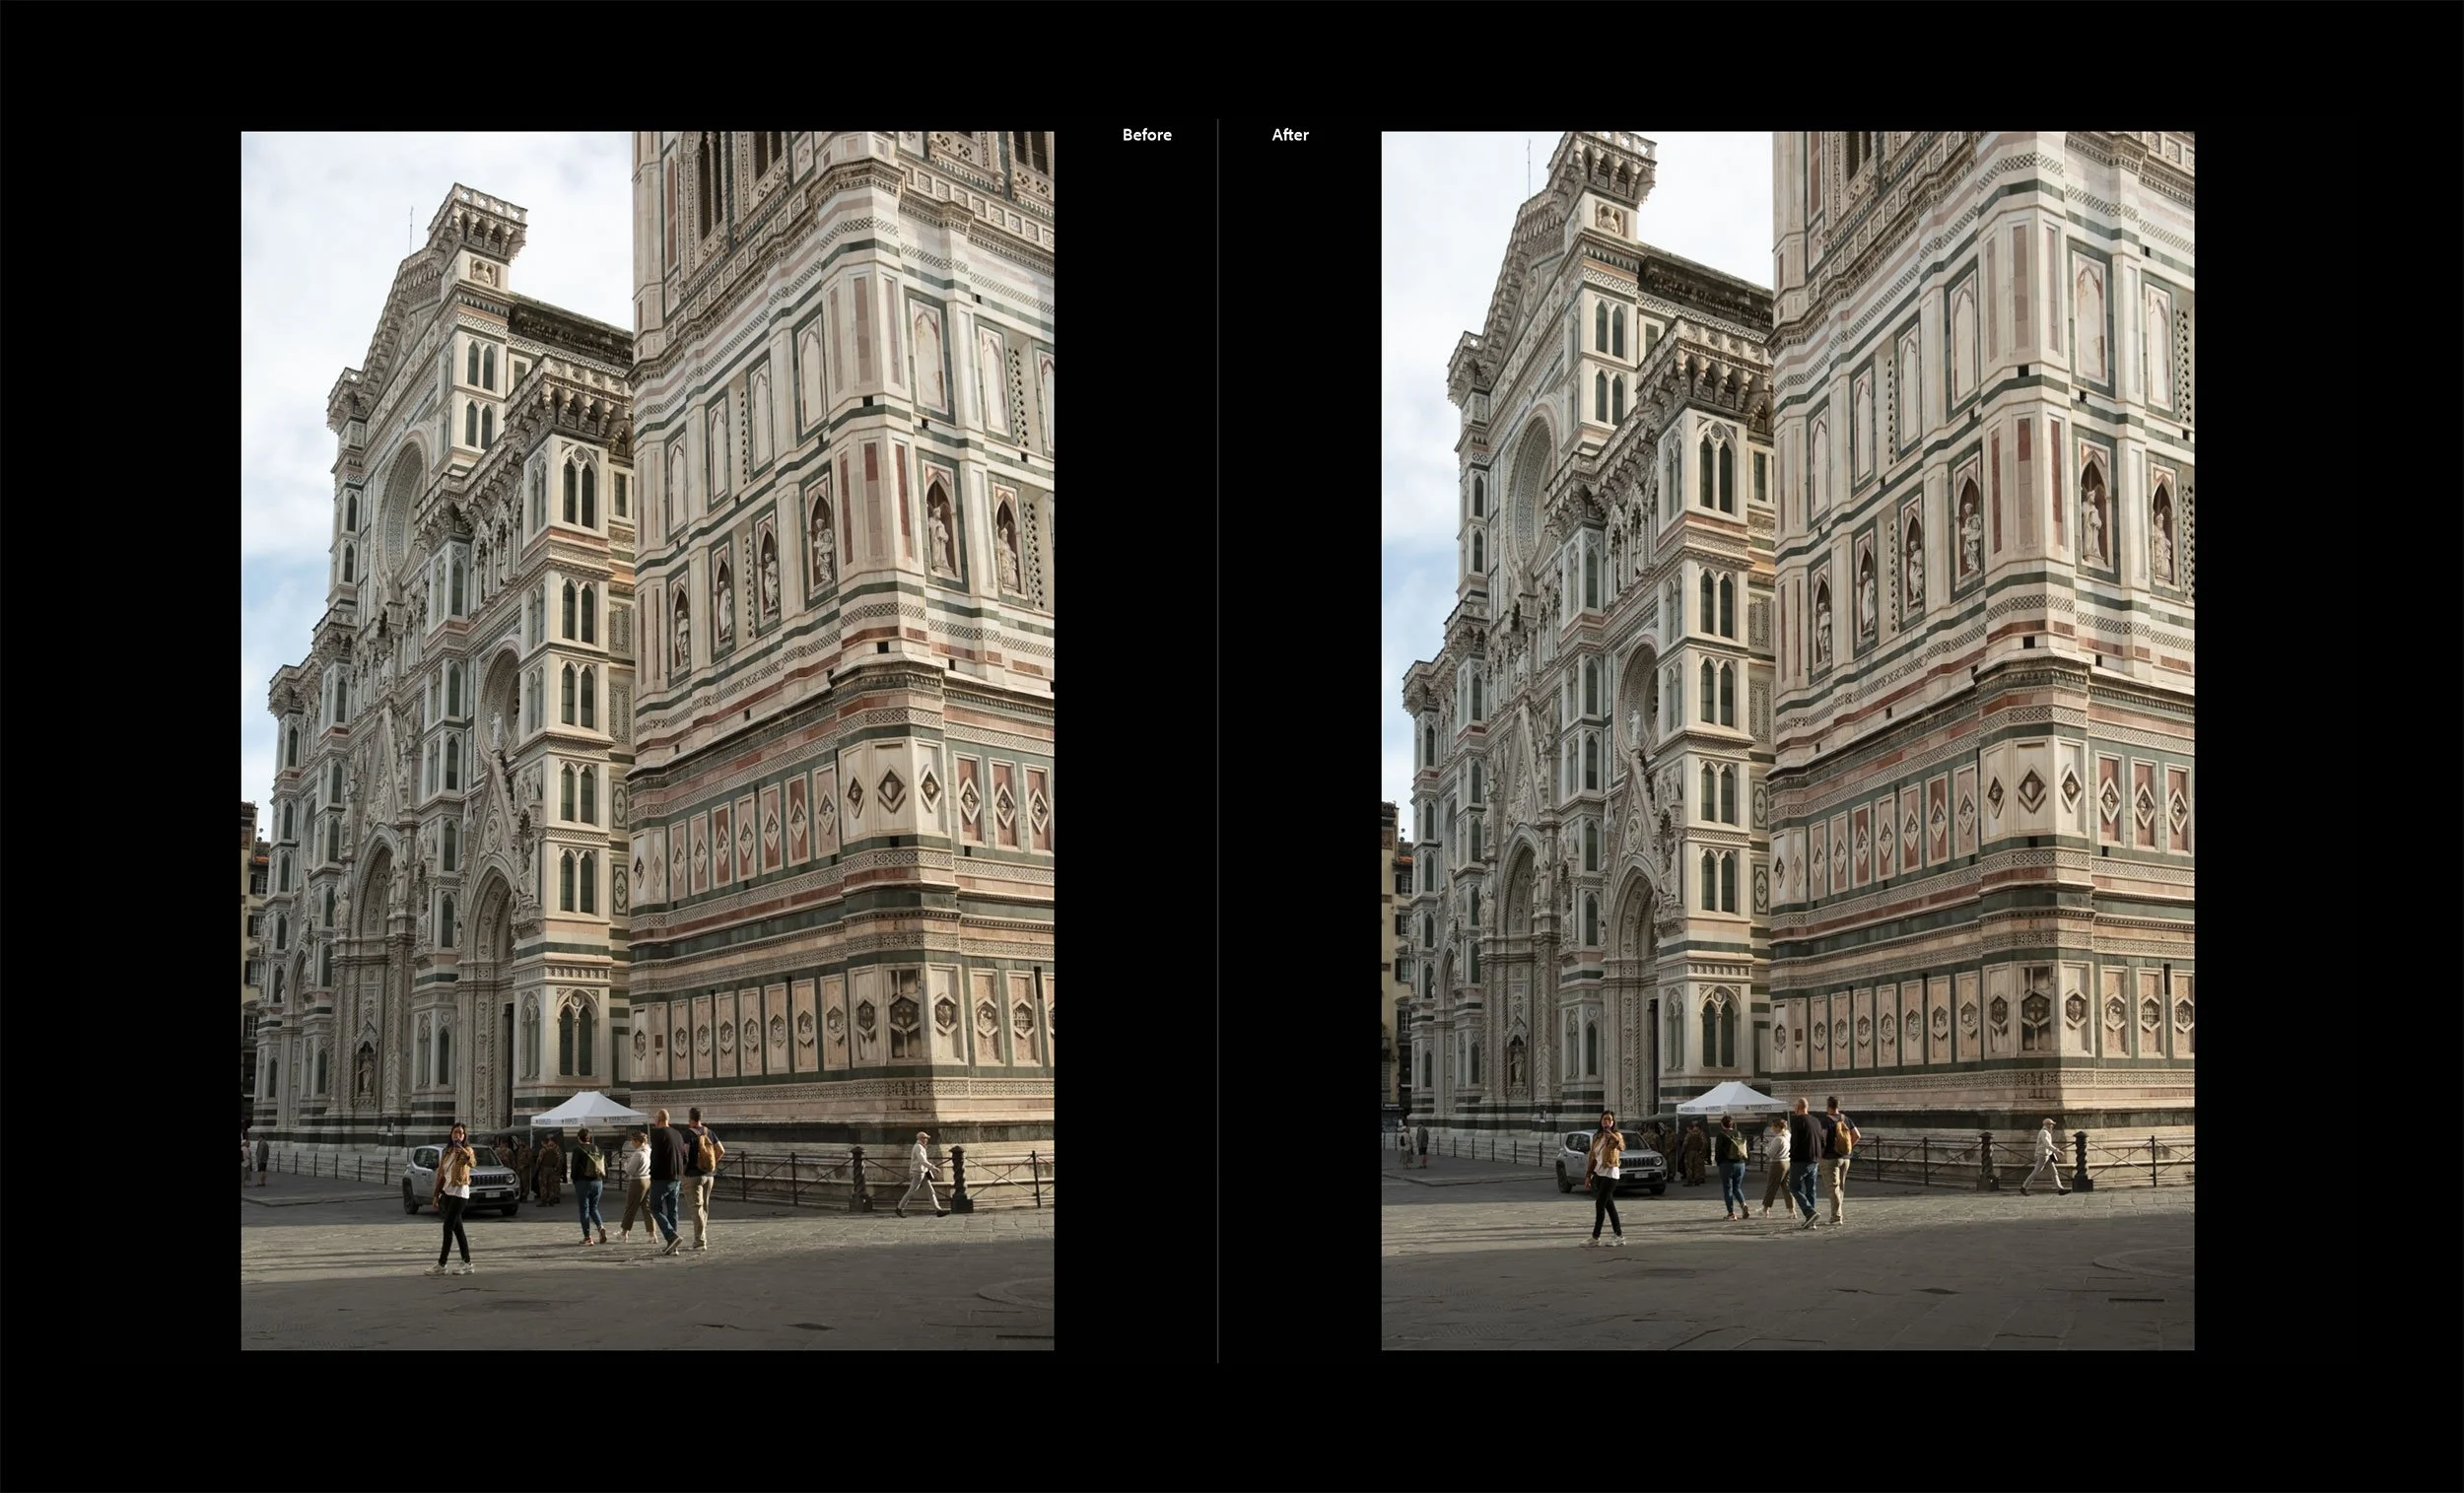
Sometimes, you will get unwanted elements in your travel photos, and cropping can be an effective way to increase your composition and enhance the impact of your image. This is where a higher megapixel camera comes in handy as you can crop as needed and still have a larger photo for bigger display purposes. In the following image, I used the Transform tool to fix the angles, primarily evident in the brick wall to the left. Then, it was cropped to remove the people on the right and to bring the couple into the middle of the frame. Quick adjustments that make a big difference.

Vertical Transform and Crop to center and remove people at right of frame
Maintain Consistency
You’ll want to maintain consistency between all your images for any travel outing. This isn’t when you will want to experiment with different film simulations and recipes or new post-processing methods. There are exceptions to this, and I wouldn’t even say this is a rule, but generally, you will want a consistent look that people can follow through your photos as they browse your gallery.
Now, the weather changes, and going from a bright, sunny day to one more overcast or gloomy, changing up the look makes sense. But the same day and similar subjects, try to keep it close to the same. Seeing similar subjects or angles of a subject with completely different editing techniques looks off. It doesn’t flow through a gallery.
I use one film simulation per city when I have consistent weather. I may have a few monochrome images, and I’ll try an alternative film recipe on darker, cloudier days, but I always shoot RAW + JPEG when travelling. If the film recipe is something I dislike, I always have the RAWs to create my consistent look.
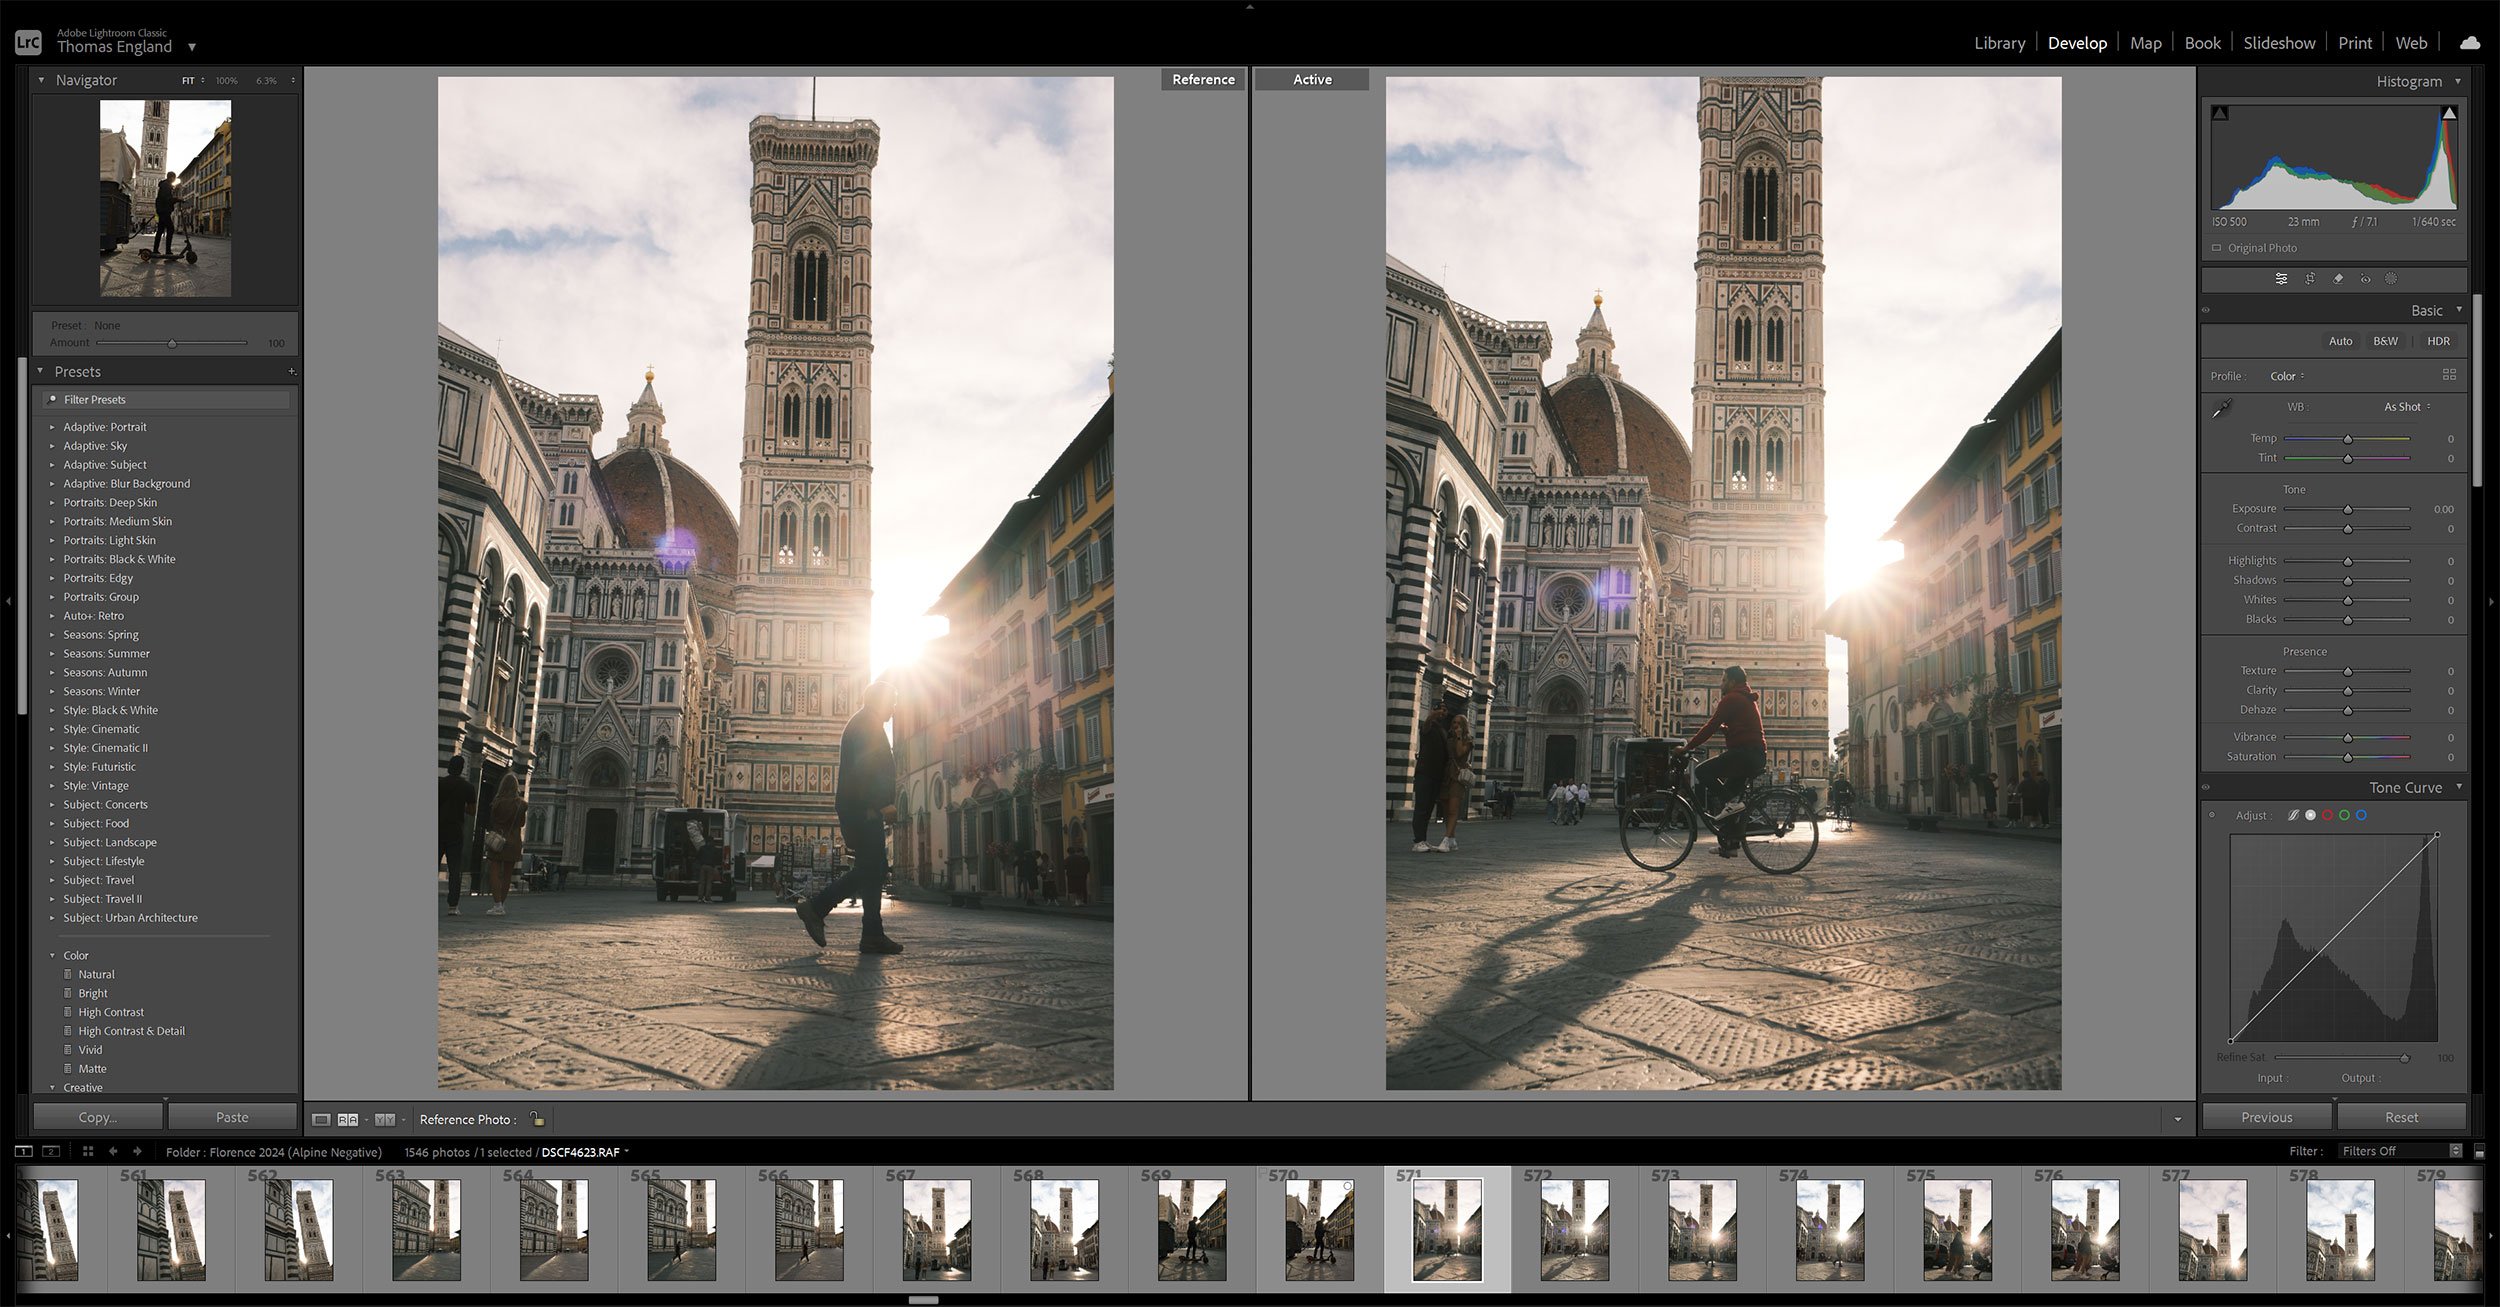
NOTE: One of my favourite ways to work on photos while maintaining consistency is using Reference View in Lightroom. Reference View allows you to compare one image to the next. Of course, you can always copy/paste Develop settings from photo to photo or save a preset of your own, but I feel Reference View is a great way to ensure that the exposure is consistent from photo to photo.
Conclusion
Editing travel photography comes down to personal taste, and your steps will differ from mine. You may also have a process that you follow. The above is what works in my workflow, and these steps are the ones I often consider in my travel photography. Straightening a building works well but is not always applicable; the same goes for fixing a crooked horizon. Cropping is an easy way to create more interest in your photo, and consistency with a series works well for a collective of work from a specific place. No matter how you process your travel photos, small things can make a big difference, and these are steps you can consider if you haven’t already done so.