How I Did This: BMW M2
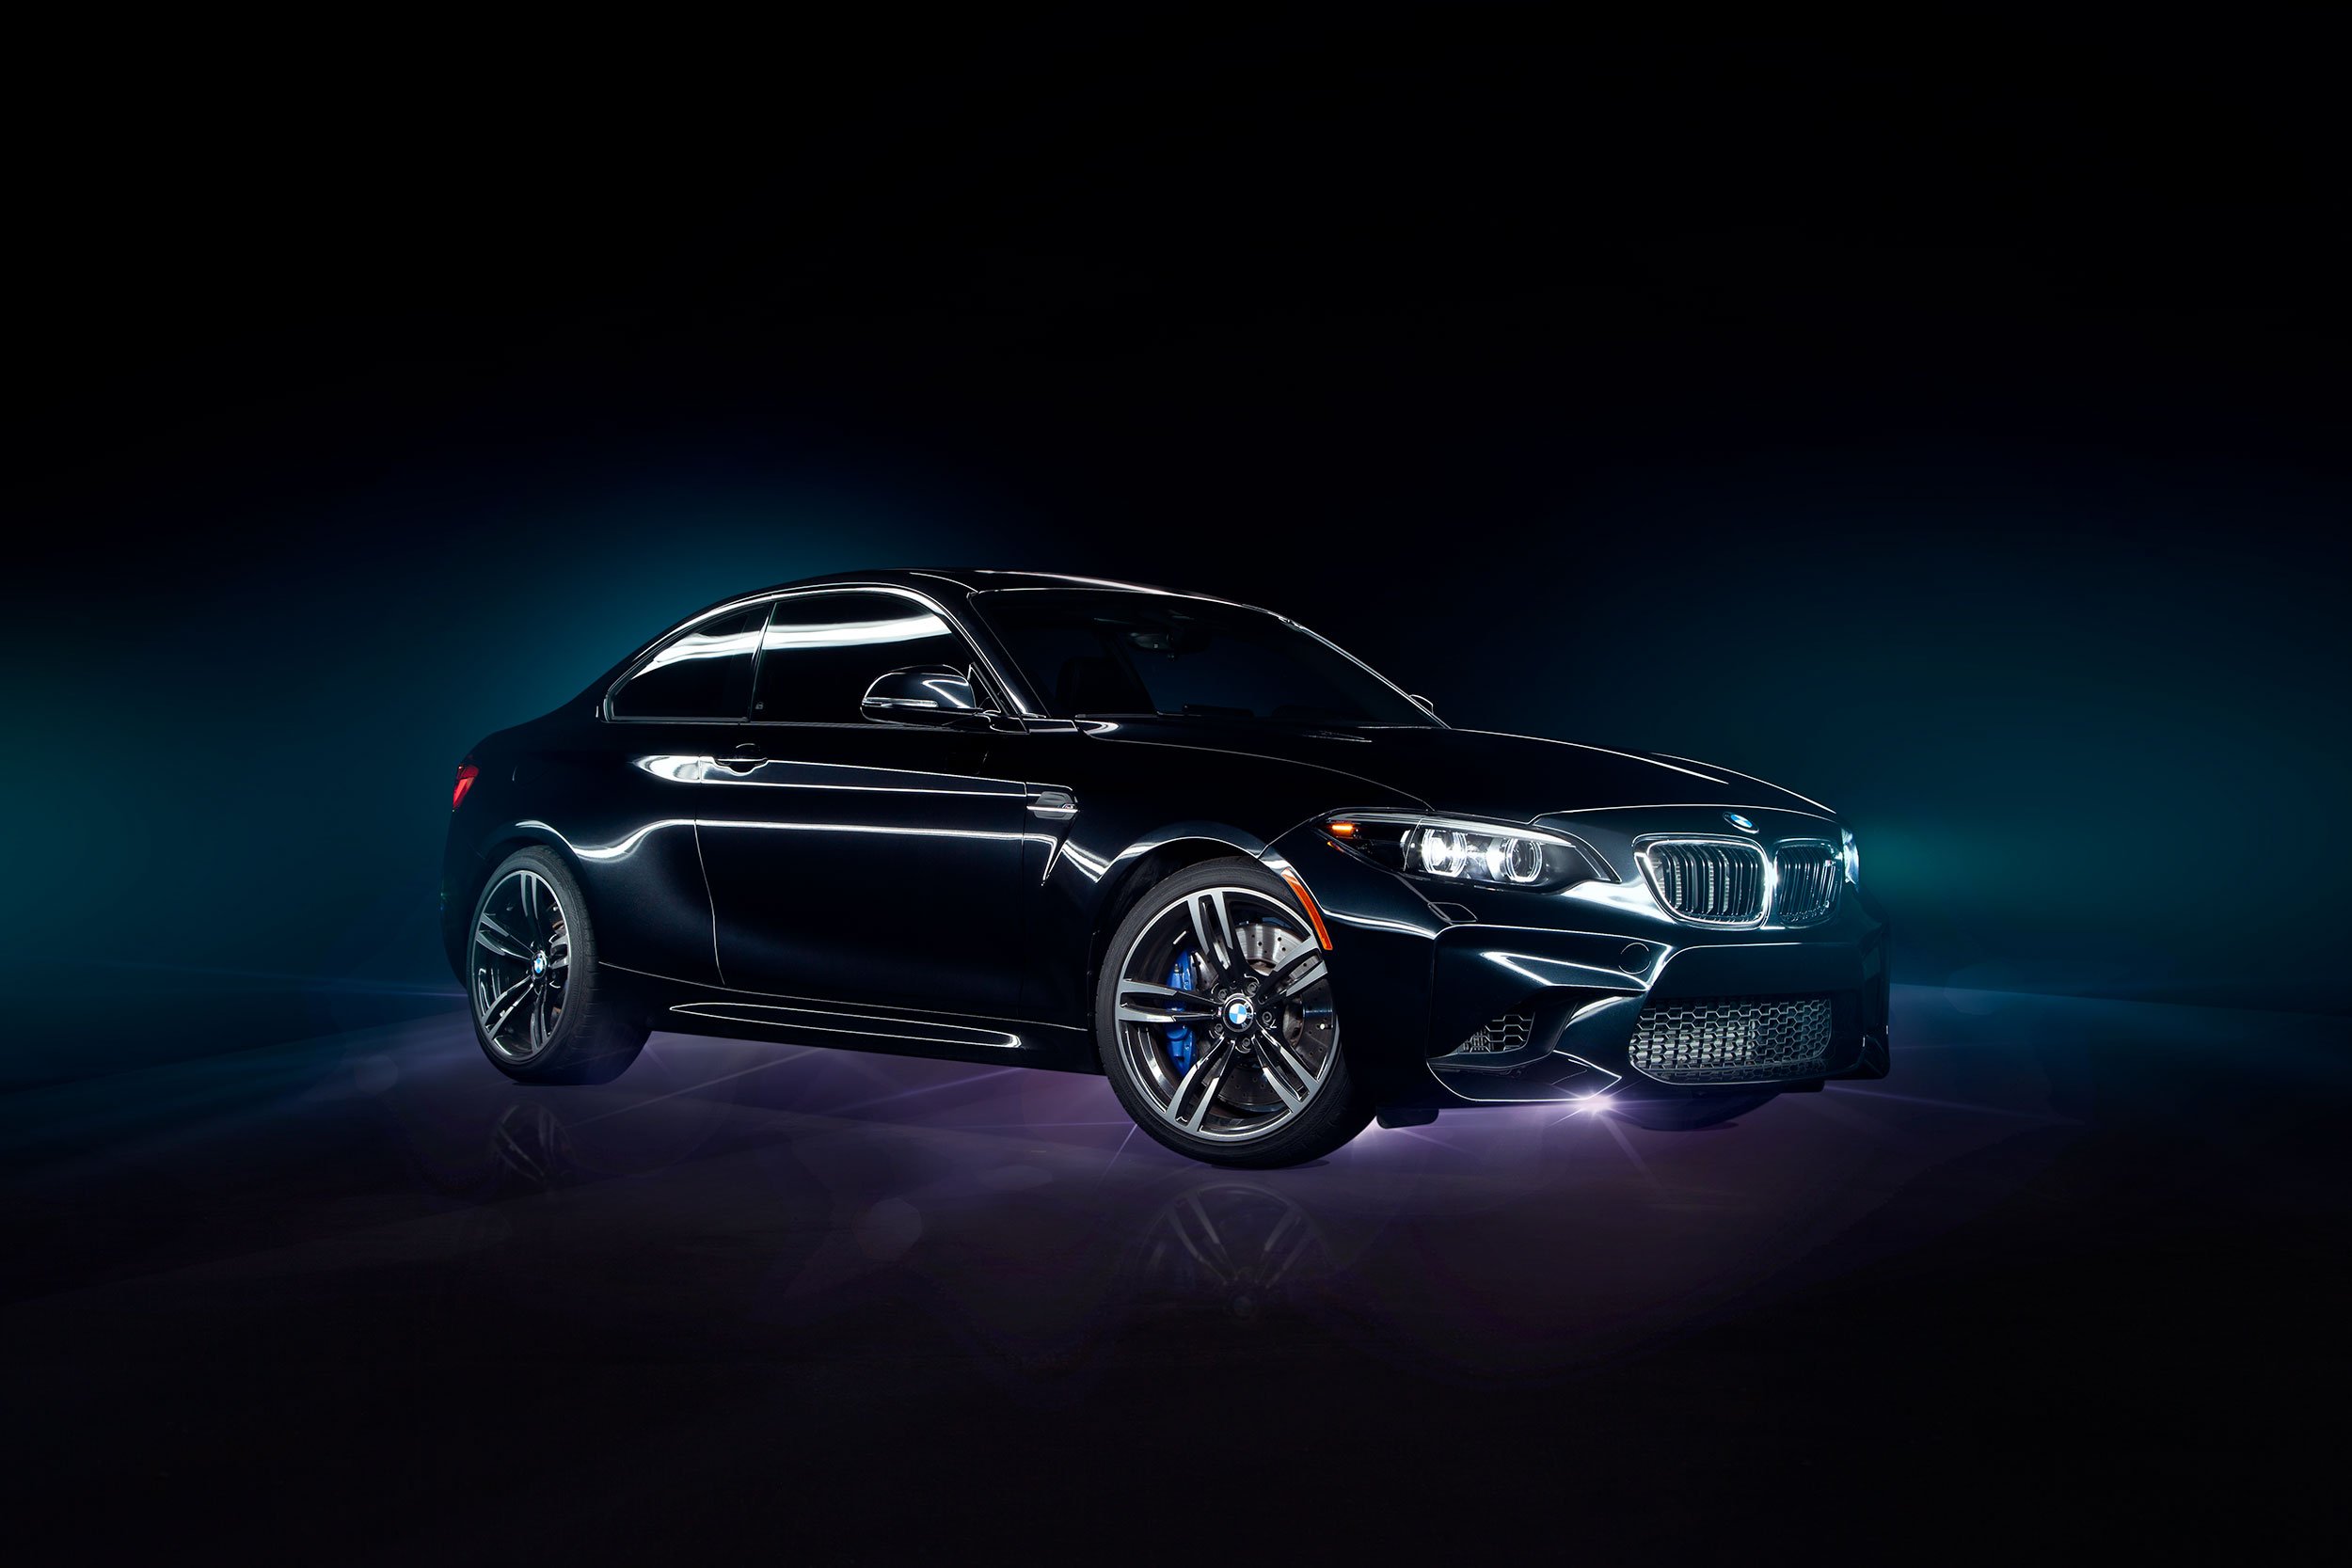
Final photo.
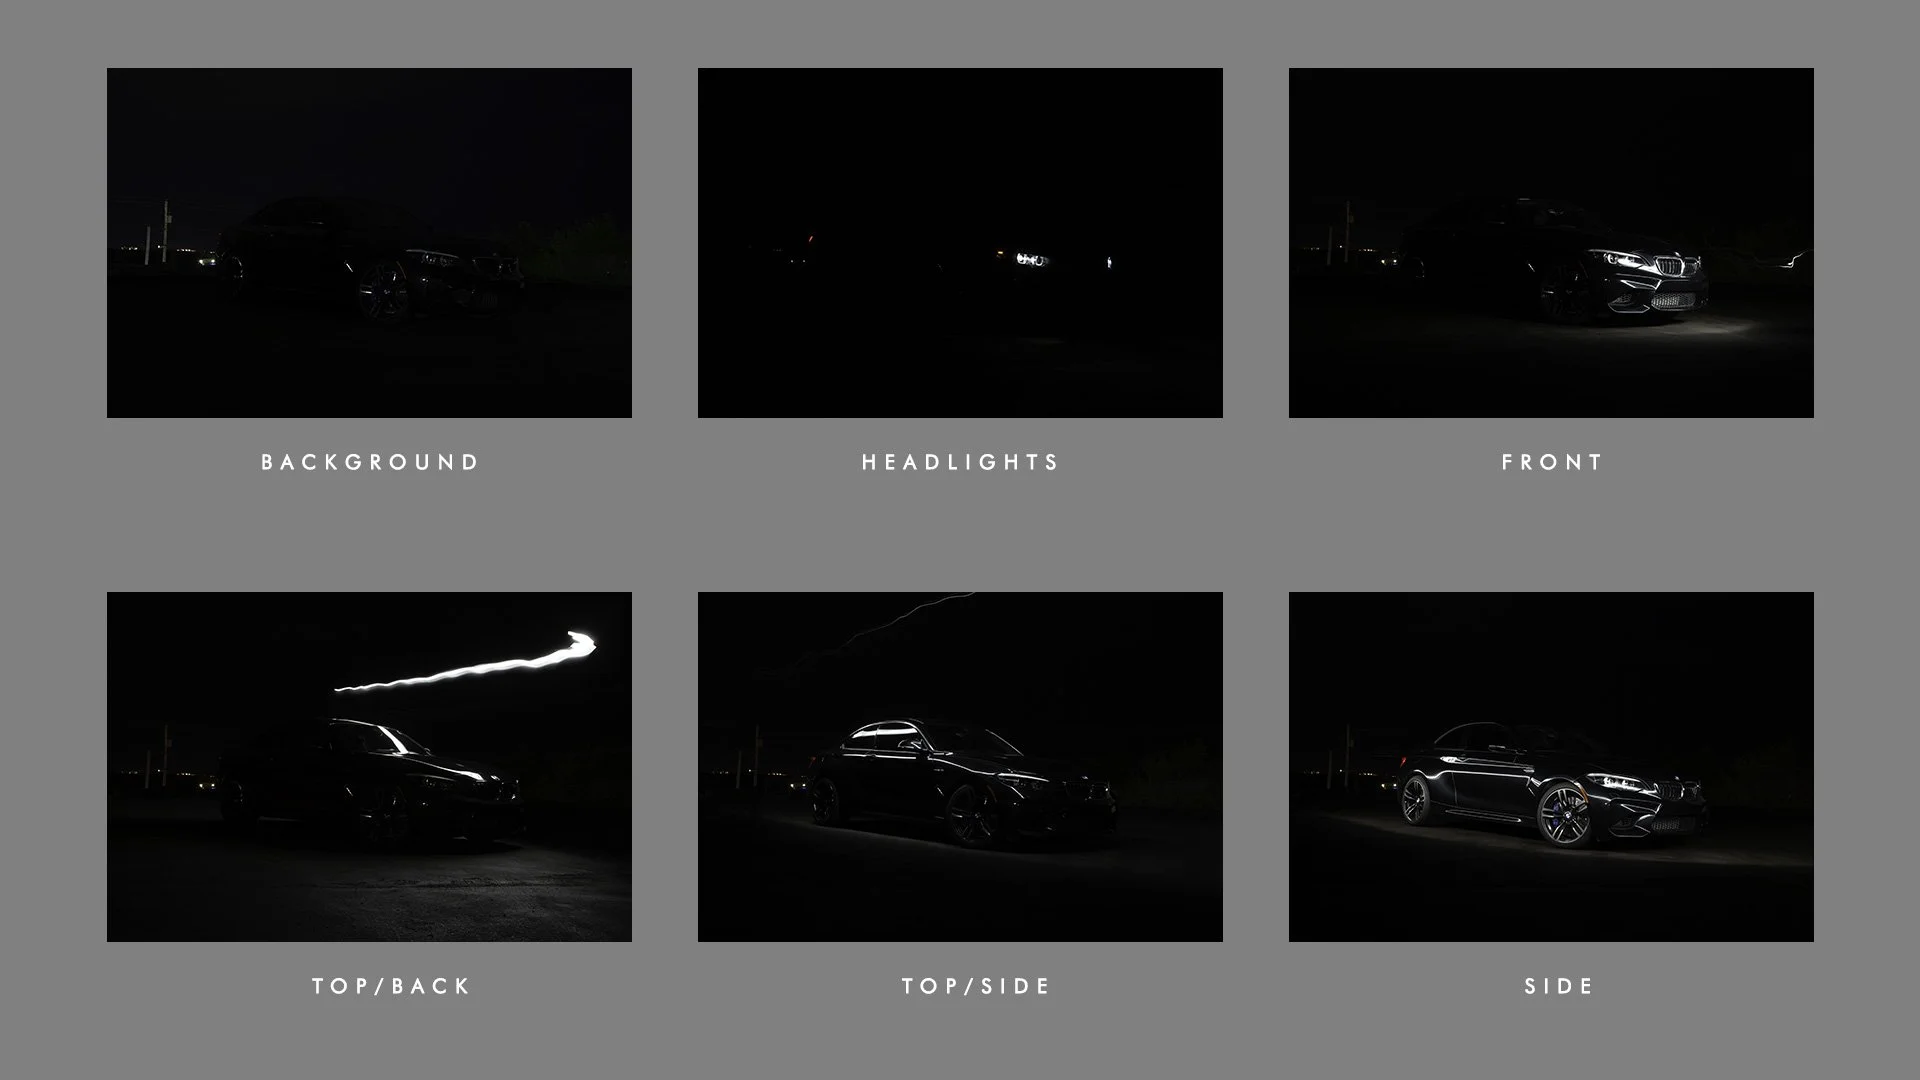
When light painting a car, multiple exposures that light different portions of the car are needed. The number of exposures will vary depending on the desired look. Still, you usually look at five to six exposures as a minimum, including the side, front (or back), and top. It would be best to capture separate exposures of the wheels, headlights (or tail lights), and the interior. Again, this all comes down to what look you are going for. The car’s colour can affect how much exposure is needed, as black cars can be more challenging to light than light-coloured cars.
For this shoot with this F87 BMW M2, I wanted to create a studio look with minimal background distractions.
The Exposures
I used a tripod for the following exposures if it’s not apparent. For the first, the background, I used a 30-second exposure as this would give me a foreground and background free from any light interference. I would adjust the f-stop as needed for a brighter or darker background, but for the one you see, it was at f/7.1.
Next, I turned on the car’s lights and captured the headlights and tail lights with a 0.4-second exposure. I thought they could be overexposed, but even if they were, highlight adjustments are simple in Lightroom, and I was not concerned if I needed to adjust the intensity of the light.
The subsequent four frames were all shot with a 13-second exposure, including the front, top/back, top/side, and side, and with the six frames. I exported them into Photoshop by selecting all six and using the Edit as Layers in Photoshop option, which will export all selected and create a document with each as a separate layer within that document.
Six exposures lighting each area of the car.
Car Selection
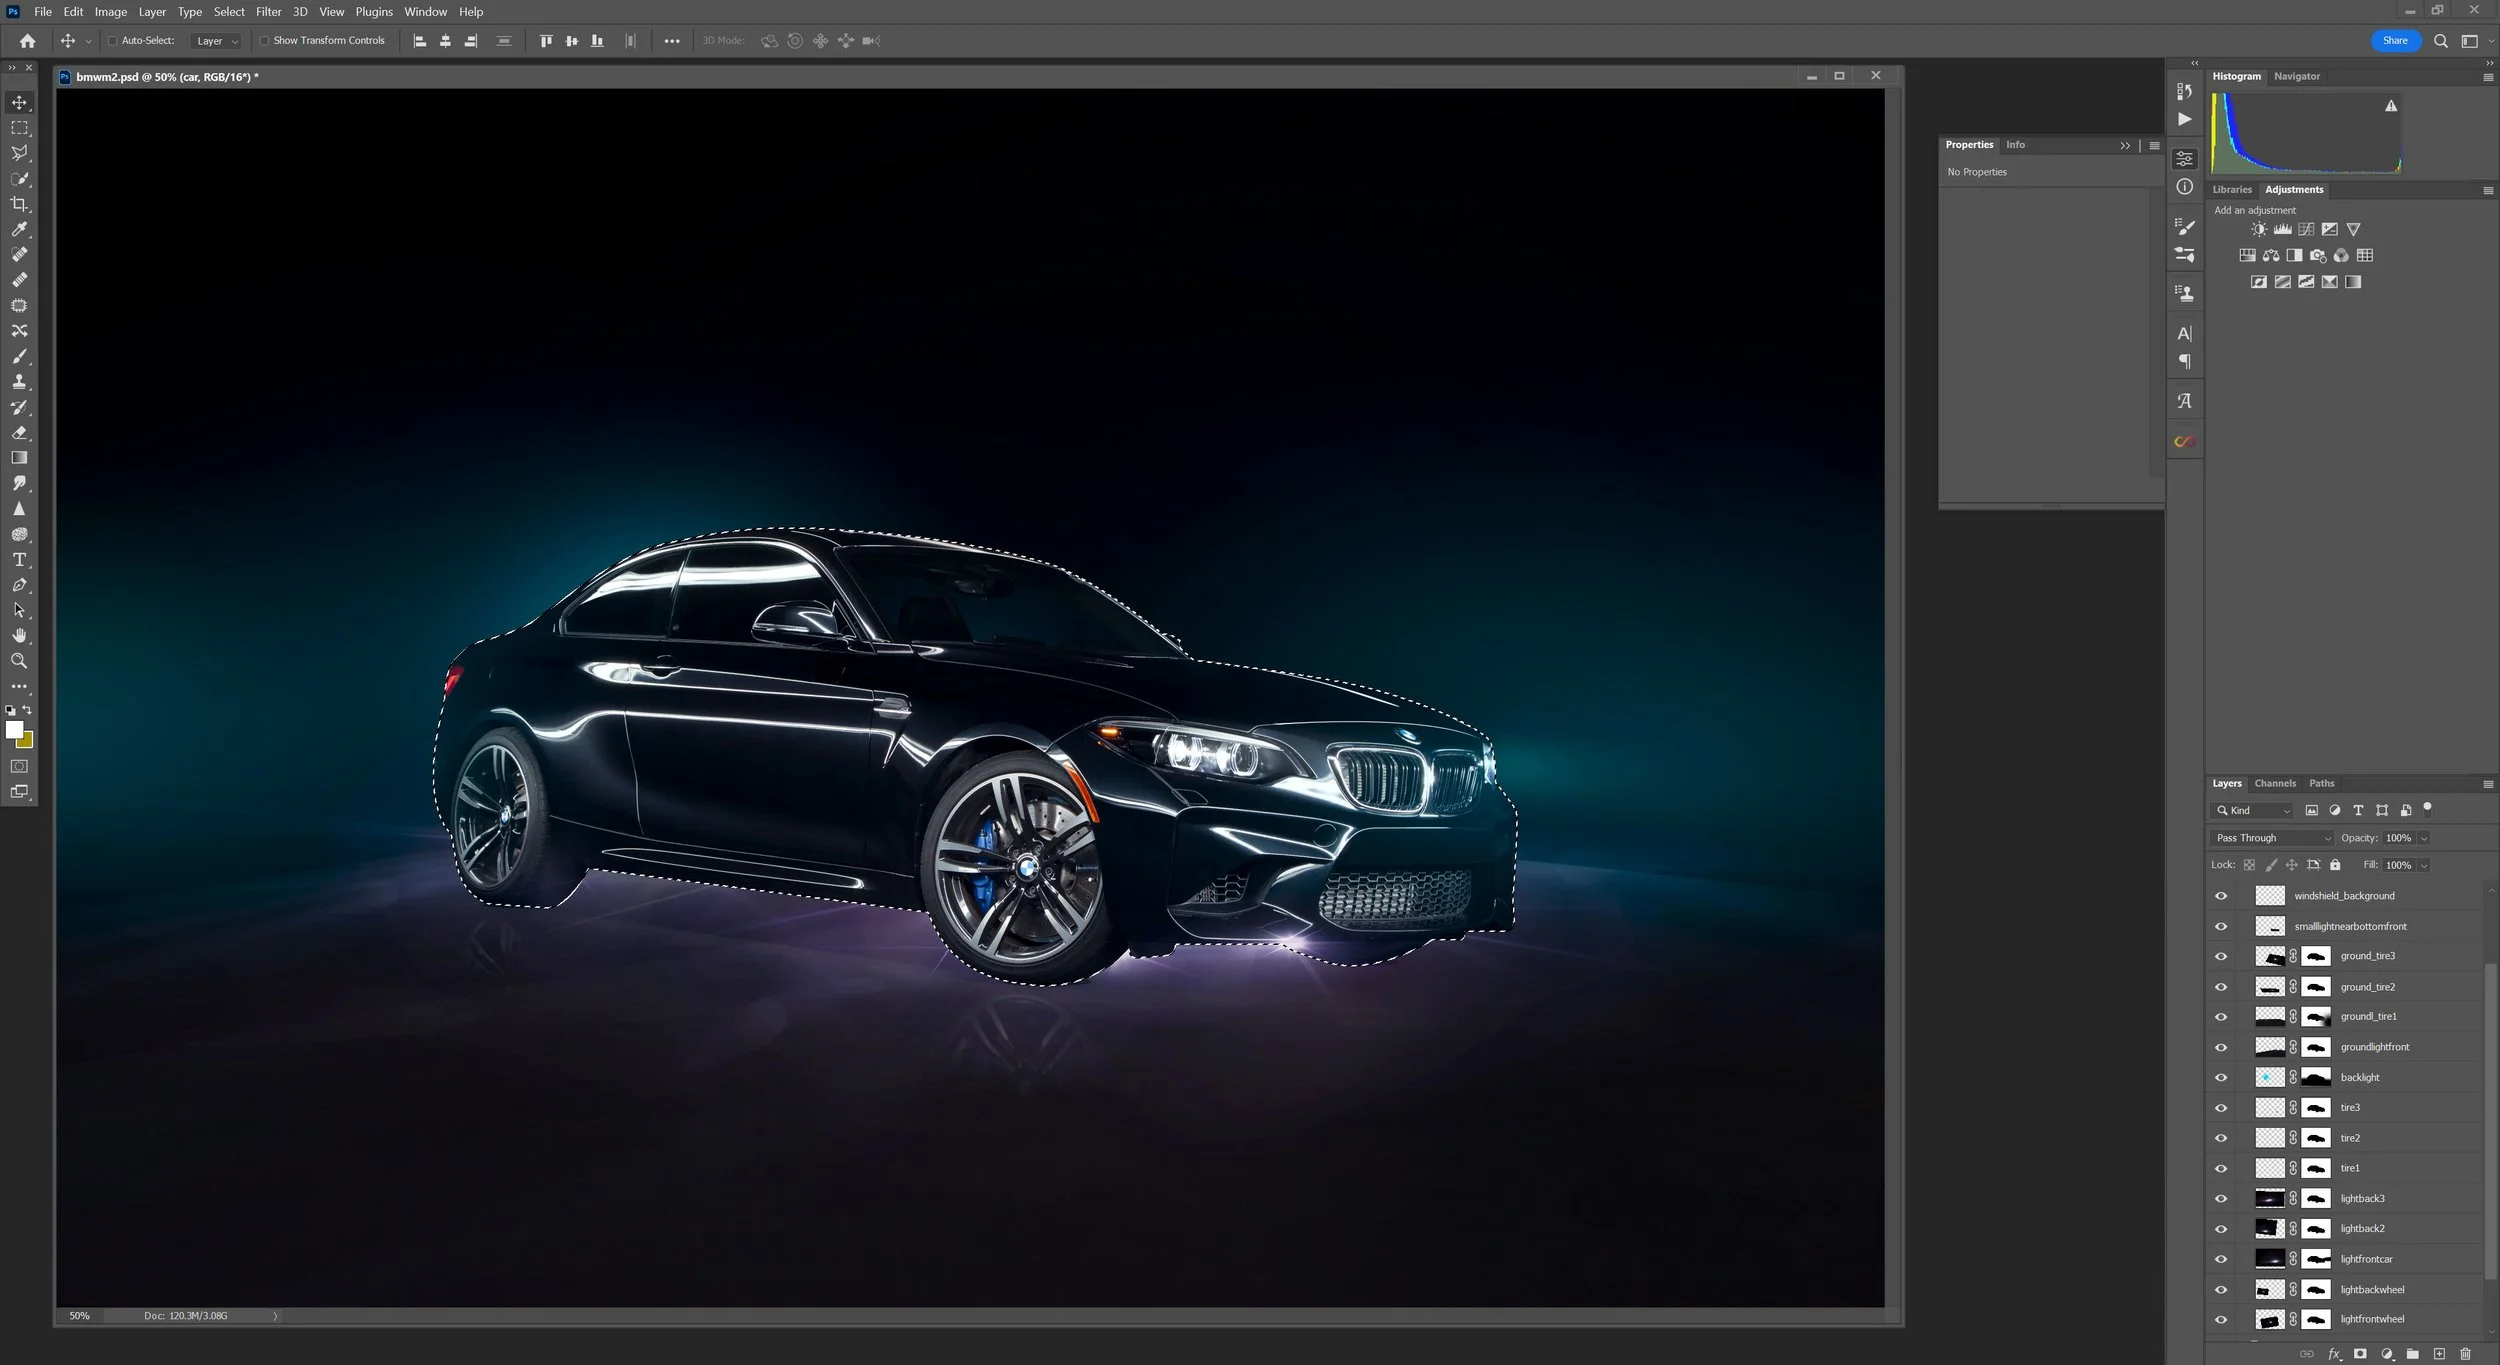
Before starting with masking, I created a selection around the car using the pen tool, and for ease of masking, I saved that selection so I could call it up when needed. Creating and saving a selection makes the process so much easier as it will separate the car from the background, allowing adjustments on either the car or the background without worrying about corners influencing the masking procedure.
Masking Layers
In Photoshop, I had one document that included the six layers, and now that I am in Photoshop, my first task is to name the layers before proceeding. It’s always good practice to name your layers, but I felt this one would have many. Also, those layers would be put in folders for further organization. I moved my background layer to the bottom, leaving the blend mode to normal and for the other five layers, I changed the blend mode on each to lighten. Blending these layers includes adding a mask to each one (minus the background) and masking out the portions of the layer that do not want to reveal the lighted parts of each layer. Once that masking process was completed, I grouped the six layers in a folder and moved on to the next step of cleaning up on a new layer.
Using the Pen Tool to make a selection around the car.
Clean Up and Additional Light
The clean-up consisted of two processes. First, one layer is used to clean up dirt, dust, and any other distracting elements, and another layer is used to add artificial light, which consists of using the pen tool to create shapes and filling the selections with white. (or sample a colour of the existing light which is close to pure white anyway) The addition of artificial light in the photo was minimal, but I included light around the hood to make it stand out and separate the hood from the background. For adjustments, I added a curves adjustment to the wheels to brighten them up, and since I wanted this to look like a smooth surface, I cloned and flipped the wheels to create the illusion of a reflection masking out the “top” of the wheels as they fade away into the foreground.
Light Effects, Shadows, Background Smoke/Haze
This process was the most time-consuming, as I wasn’t quite sure how this would look when I started. The lighting effects you see beneath the car include a series of light flares that are first toned to be cool in colour and then added and skewed to create different perspectives as needed. In total, there are ten additional layers of these flares. I also created small shadows under each of the three visible wheels to better plant it in its environment. The headlight beams were achieved by creating a triangle shape with the polygonal lasso tool, filling it using a large white brush at zero hardness, and blurring and reducing the opacity. Finally, to both separate the car from the background and add more of an atmosphere to the overall photo, I used a smoke brush and created an effect that gives the photo a slight haze in the background that gives the impression of illumination by the lights of the car and a light placed behind the car.
Final Touches
The final touches were to fix the colour balance, as it was a bit warm overall. I added a colour balance to the background and the car, adding +2 to the shadows. To see the entire process in more detail, take a look at this video:


