Car Interior Photography: How to Get the Studio Look
In car photography, light painting is a technique that involves using a light source to create illuminated images of your vehicle. Light painting can be utilized both outside and inside the vehicle’s cabin and offers a unique and creative approach to capturing the essence of the car’s design.
When you compose to take a photo of a car’s interior, the windows will probably be part of your composition. As a result, you will capture elements outside and in the background. Depending on your shooting environment, some of these elements can be pleasing additions to your composition or could be more of a distraction.
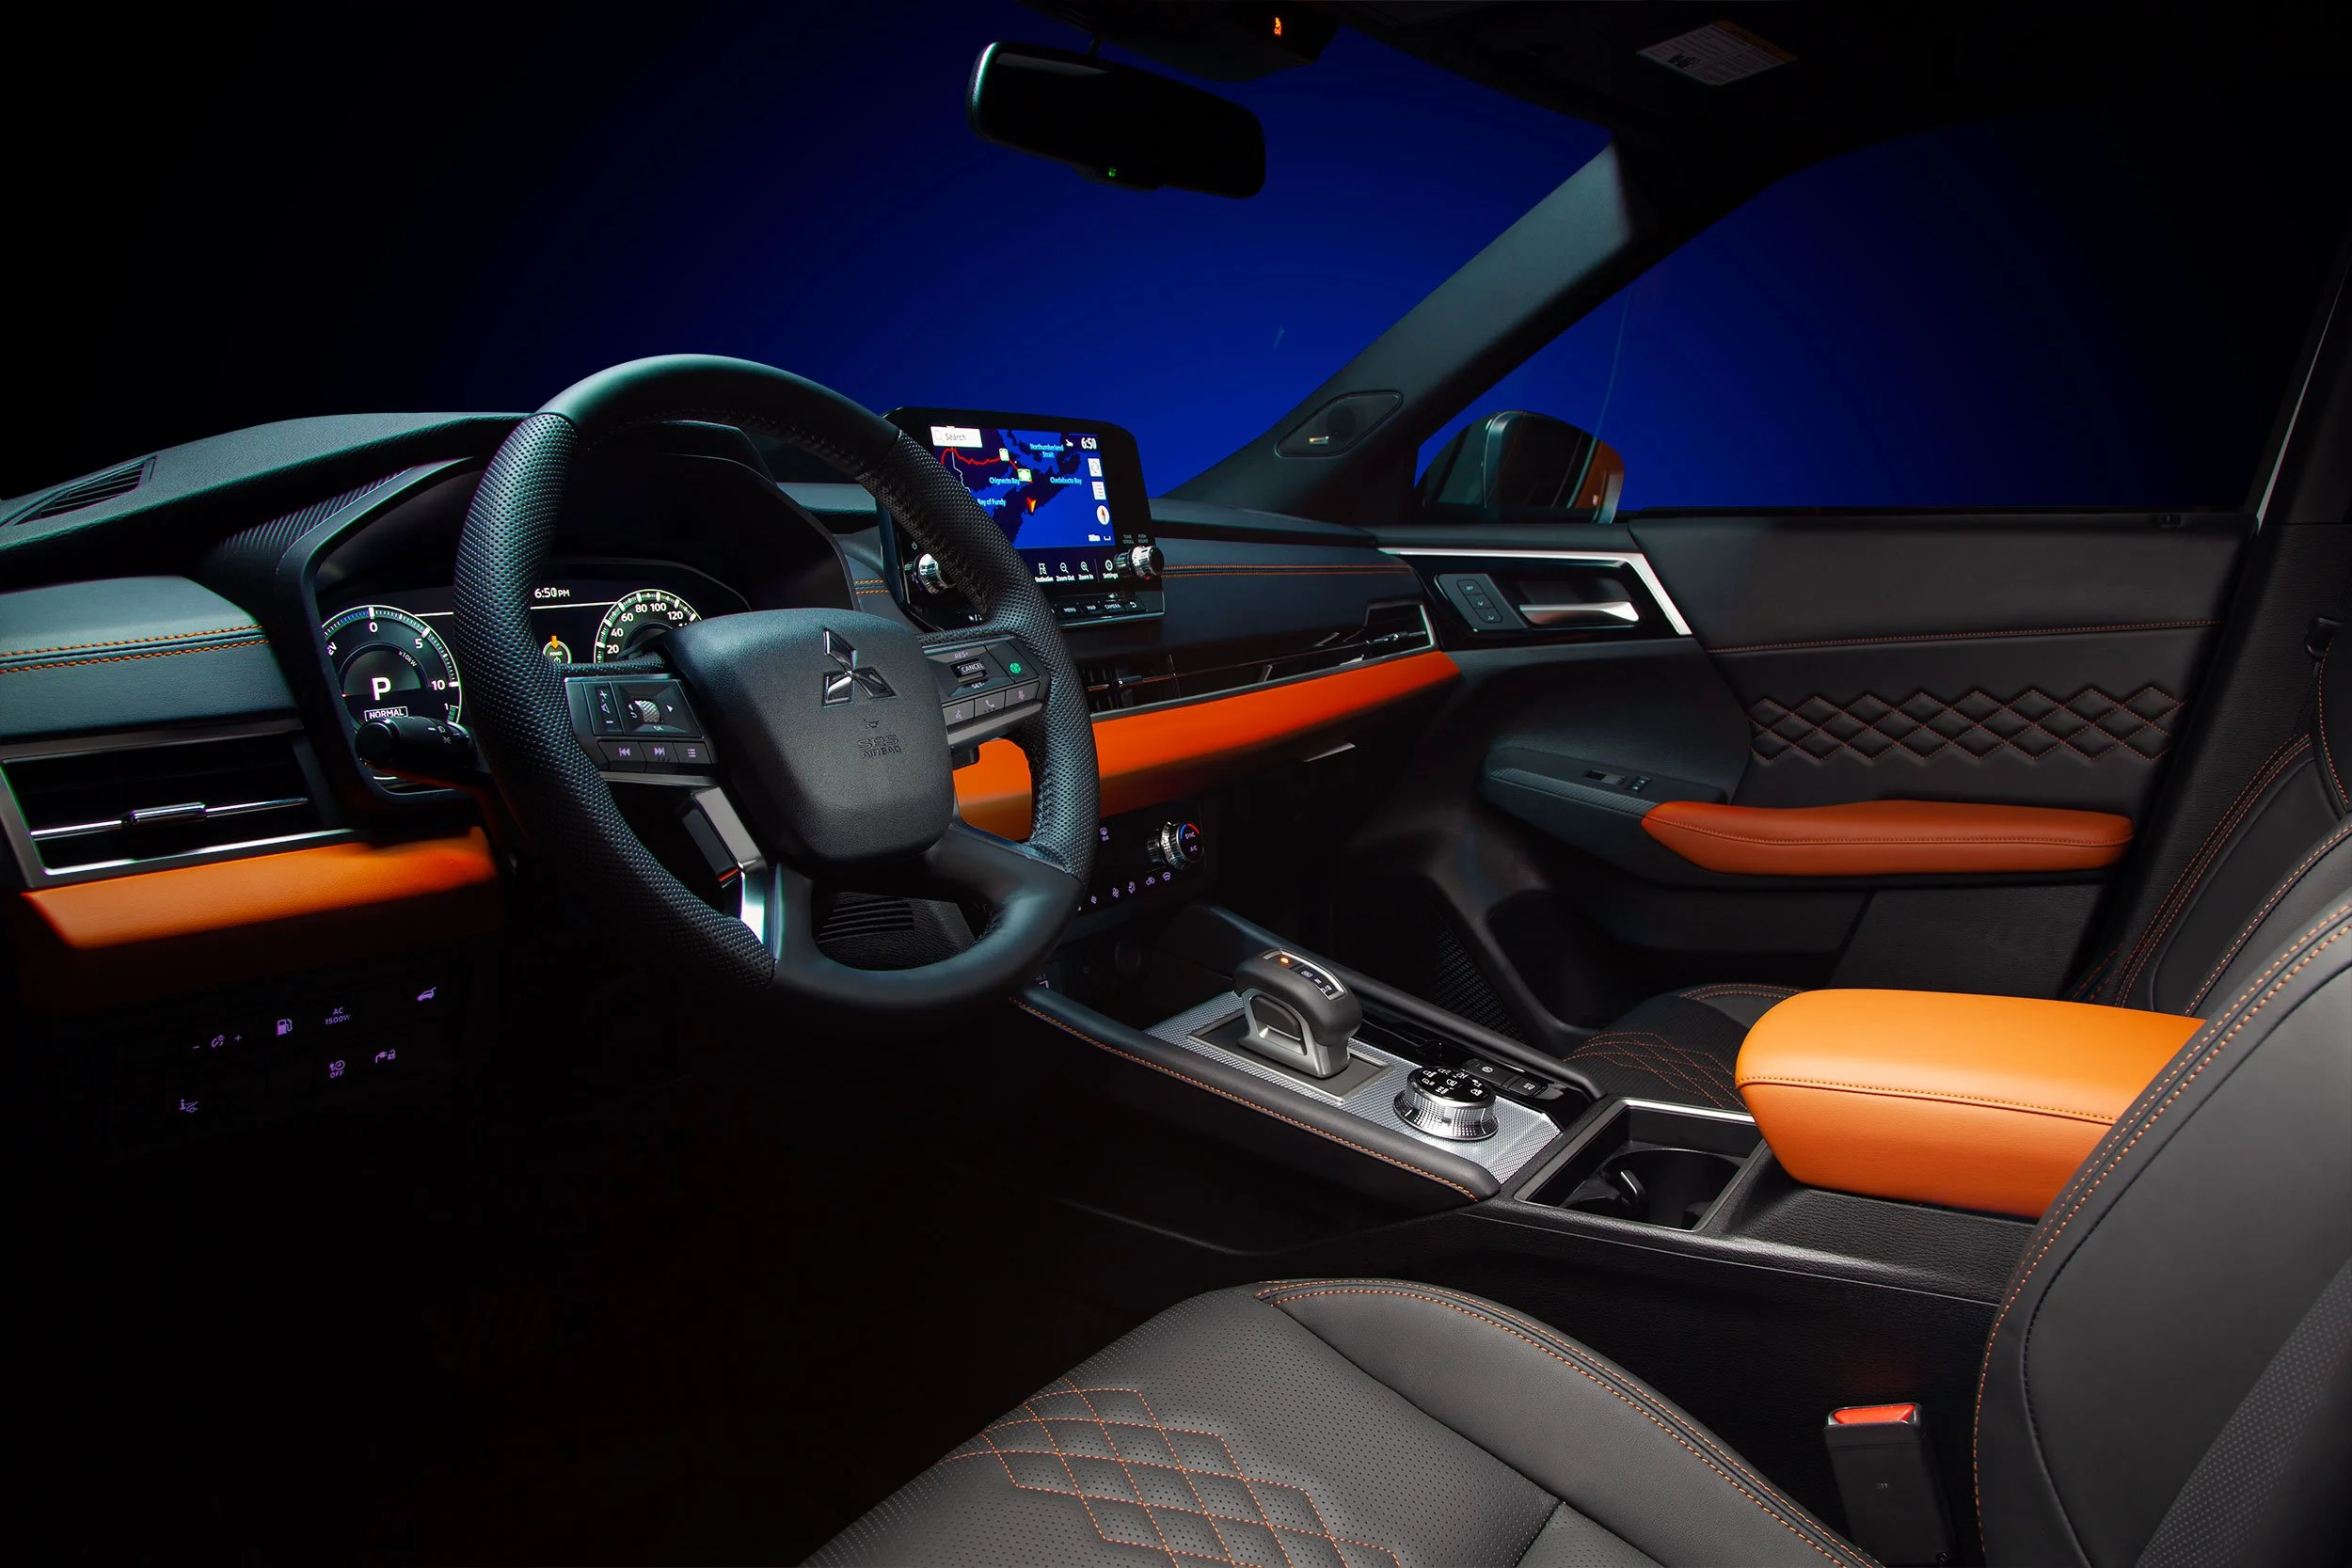
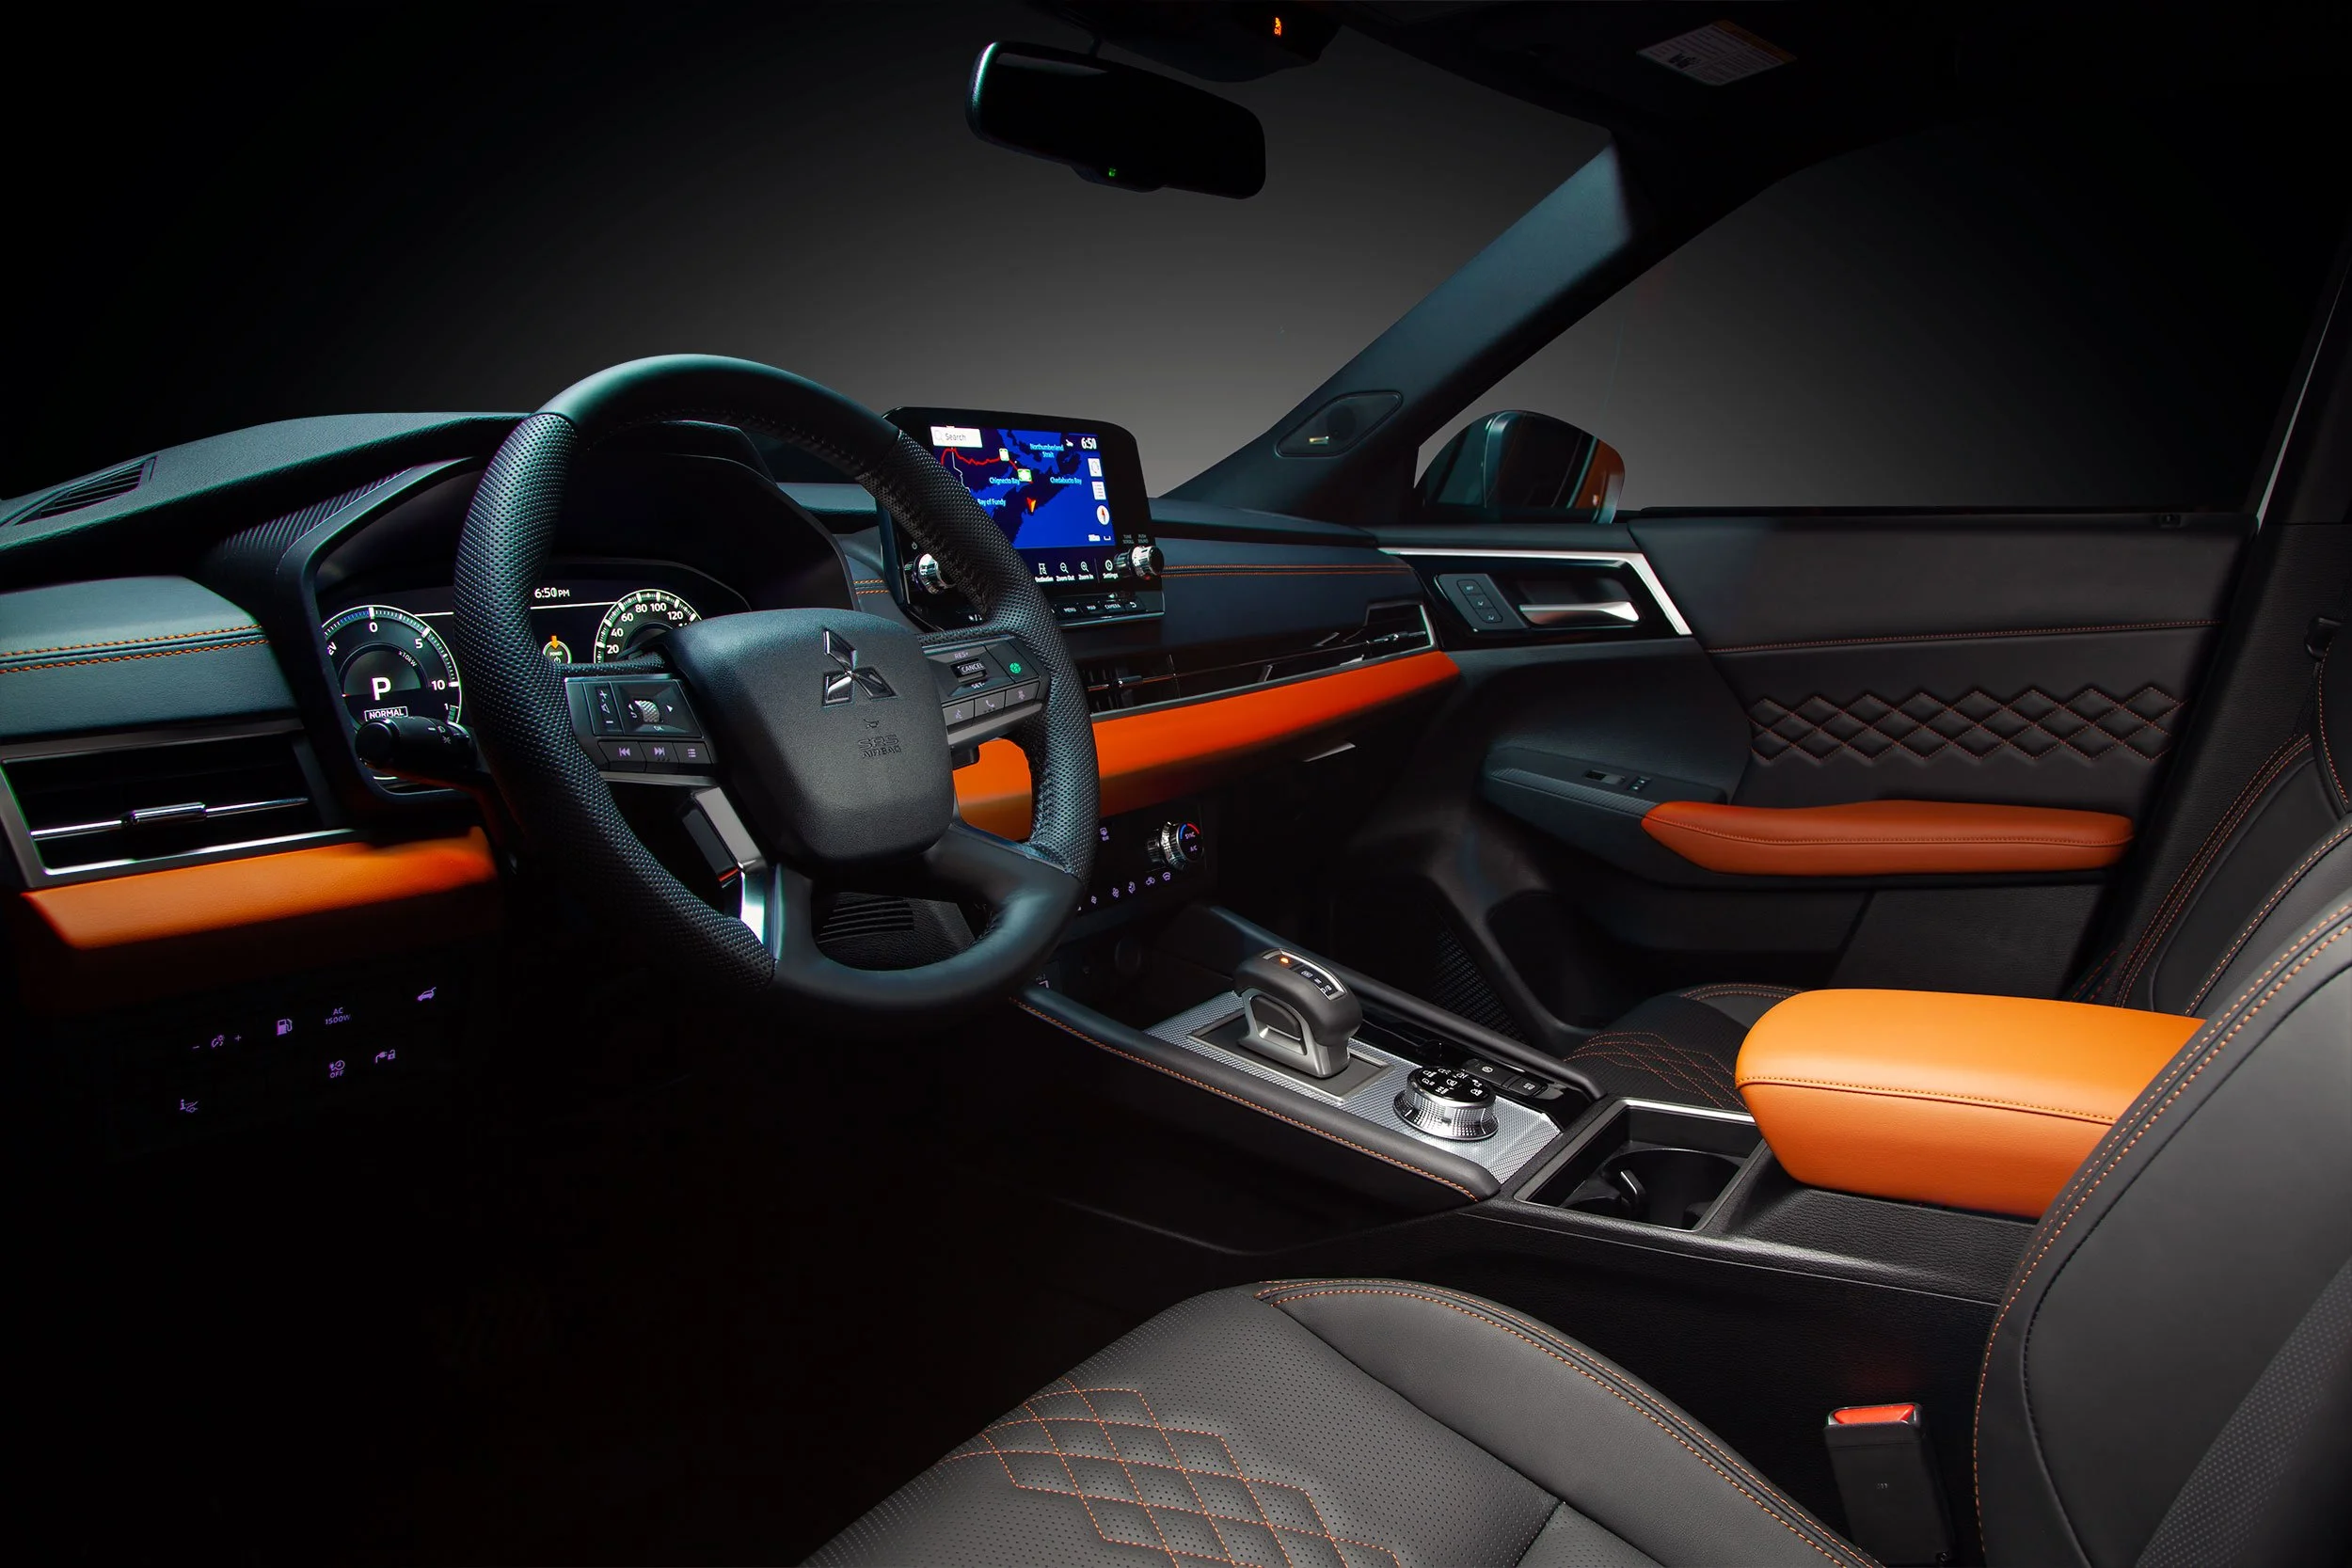
This post will review a tutorial for light-painted car interior photos that eliminates background distractions and creates a dark studio look with a simulated light source.
NOTE: For this tutorial to work, you should understand Photoshop’s Pen Tool. Also, we are beginning this tutorial with a photo that has already been blended from multiple exposures.
3 exposures used for this photo
Step 1 - The first step is to create (and save) a selection around the windows. Start on a new layer and grab the Pen Tool, zoom in and create a good selection around the windows, being careful around the curvature of the center rear-view mirror.
Make a selection around all windows needed before moving on to Step 2. (windshield, side window, etc.)
Step 2 - Once you have made your selections, grab the Path Selection Tool and select all of your created paths. Right-click (Ctrl+click on Mac) and choose “Make Selection,” choose about 0.3 or 0.4 for your Feather Radius and click “OK”. Feathering will soften the edges of your selection. You can also “expand” your selection by selecting Select > Modify > Expand. 1 pixel is probably enough.
Step 3 - Save your selection by going to Select > Save Selection. Name this selection whatever you want. We will recall this selection later when we add additional light.
Step 4 - With your selection active, go to Edit > Fill > Black. Deselect when filled. As a result, your outside view is filled with black and now we are ready to add our own light source effect.
Now that we have a background filled with black and a saved selection, we can experiment and add elements to the outside background without worrying about masking, as we can recall the selection when needed.
Step 5 - Select the Colour Picker and choose a colour (I prefer to use a colour from within the photo) by holding the Alt (Command) key and clicking on a brighter colour somewhere in the photo. Once you have chosen your colour, we can use that as the colour of our light source.
Step 6 - Create a new layer and load your selection. Select > Load Selection, choosing the selection you saved from earlier in step 3. Choose a substantially large round brush size with hardness of 0% and place your brush where you want the light to appear outside of the car. Only click once to make a single round brush stroke. Since you have your selection loaded, you should see the marching ants, and your brush stroke should only fill the area outside of the car. Deselect. Since this effect is on its own layer, you can edit the light source's intensity by playing with that layer's opacity. If you find it too bright, lower the opacity.
NOTE: If you don’t like how the light looks or want to try multiple lights or different colours, undo the step and try again.
Bonus
To add realism to the photo, you can add back some of the reflections you eliminated when you blacked out the windows, as long as you have an original source to copy from. It’s a subtle addition, but it can make a big difference. To do this, use an original exposure that contains visible reflections in the windows, make a selection around the reflections you want to put back in the photo and copy/paste them into your photo on a new top layer. Line them up and then change the blend mode to Lighten. Then, drop the opacity until the reflections look convincing to you.
Conclusion
With these steps, you should be able to successfully remove the background and add your own light source to create a studio look for your car interior photography. If you haven’t completed this step previously, don’t forget to add a new layer, zoom in close, and clean up your photo using the Spot Healing Brush, removing specs of dust, dirt and other minor distractions.
In the examples below, I have used different colours and light positions to give you an idea of some of the options available.


